Aug 16, 2024
Professional Tile Installation Techniques You Can Do Yourself

Tile installation can seem daunting, but following a clear guide makes it manageable. This guide covers essential steps, including a dry layout, applying thinset mortar, and pulling grout, ensuring a seamless tile floor. By following these steps, you can achieve professional results, transforming any space.
A dry layout helps plan the arrangement, preventing uneven tiles or misplaced cuts. Spreading thinset mortar correctly ensures tiles adhere firmly, maintaining their position over time. Grouting secures the tiles and fills joints, completing the installation.
After installation, cleaning up the grout is crucial to remove any haze left on the tiles, maintaining a polished look. Regular maintenance, including resealing grout lines, preserves the tile floor's appearance and durability, ensuring lasting quality.
In the following sections, we'll explore detailed steps for laying tile, from preparation to final touches, ensuring a smooth installation process and a beautiful result.
About Tile Installation
Tile installation involves several steps to ensure a durable, attractive finish. Following the manufacturer's recommendation for tile type and grout sealer application is crucial to prevent shifting or moisture damage. Applying thinset mortar with a notched side of a trowel ensures proper adhesion, maintaining a strong bond between tiles and the floor.
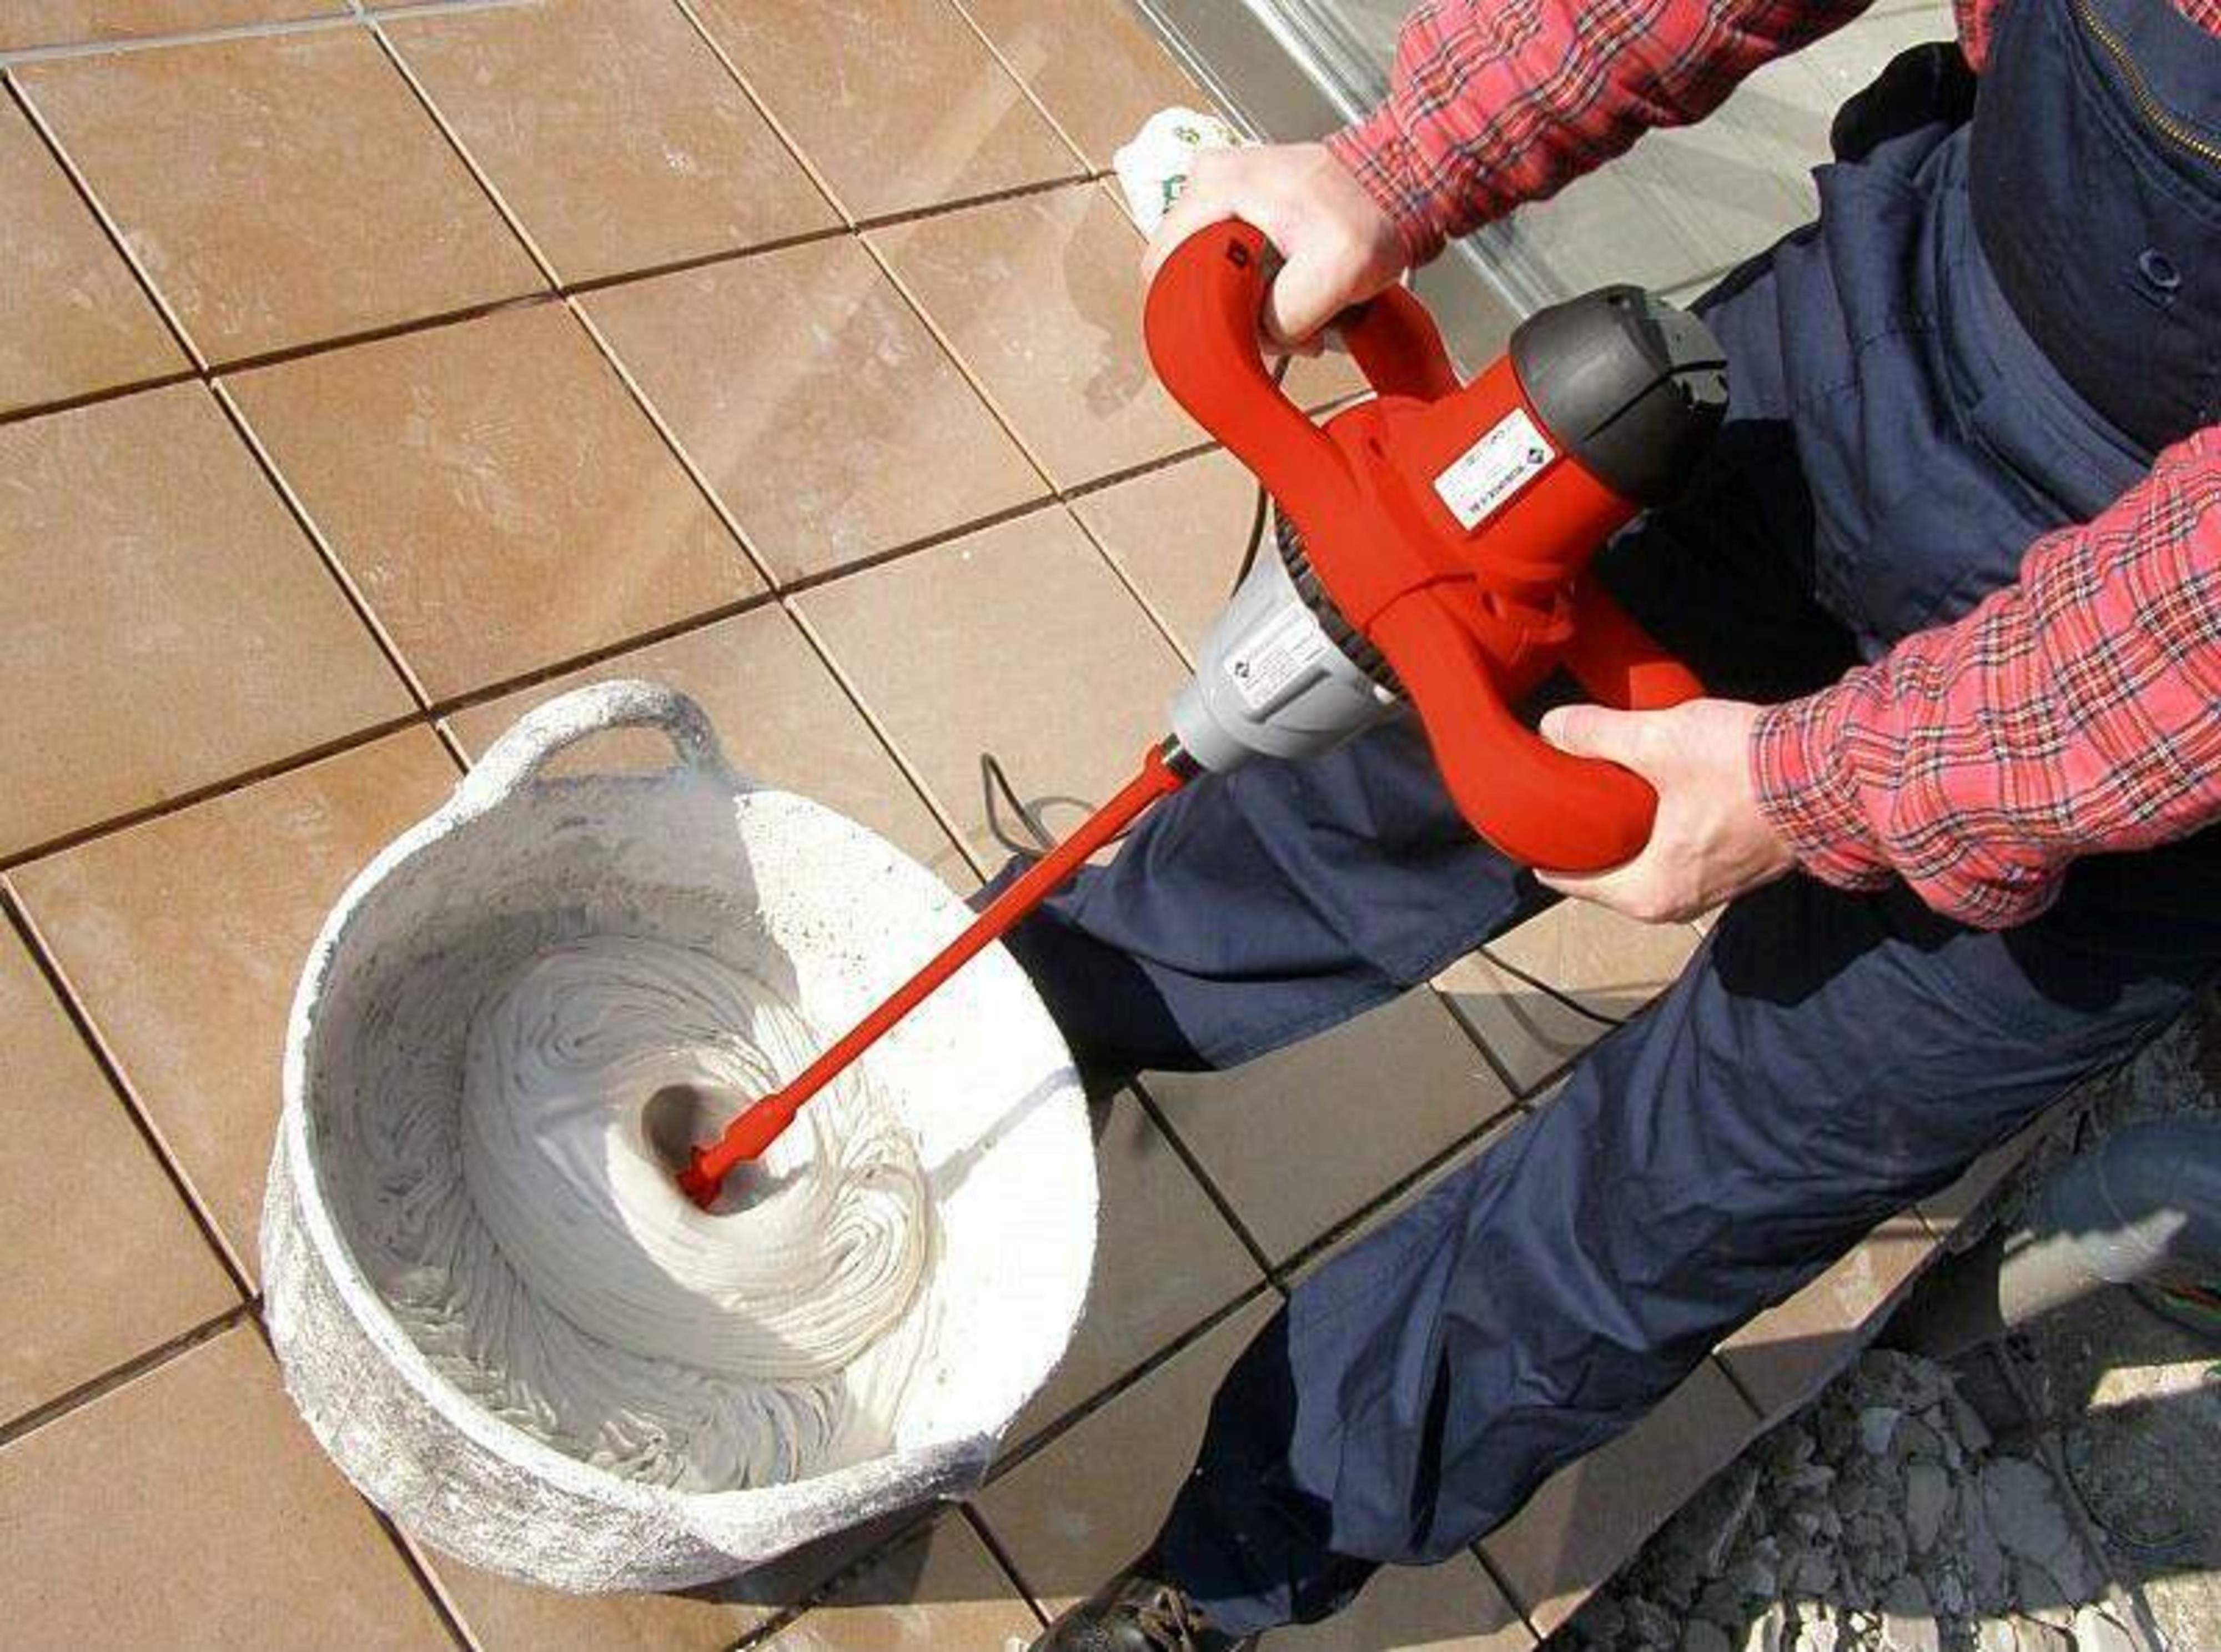
Steps To Mixing Thinset
Mixing thinset properly is crucial for ensuring tiles adhere securely to the tile surface. Start by combining water with the powdered thinset, following the manufacturer's instructions for consistency. Mix thoroughly until smooth, then let it sit for 10 minutes before remixing to achieve an even texture, ensuring a strong bond when applied.
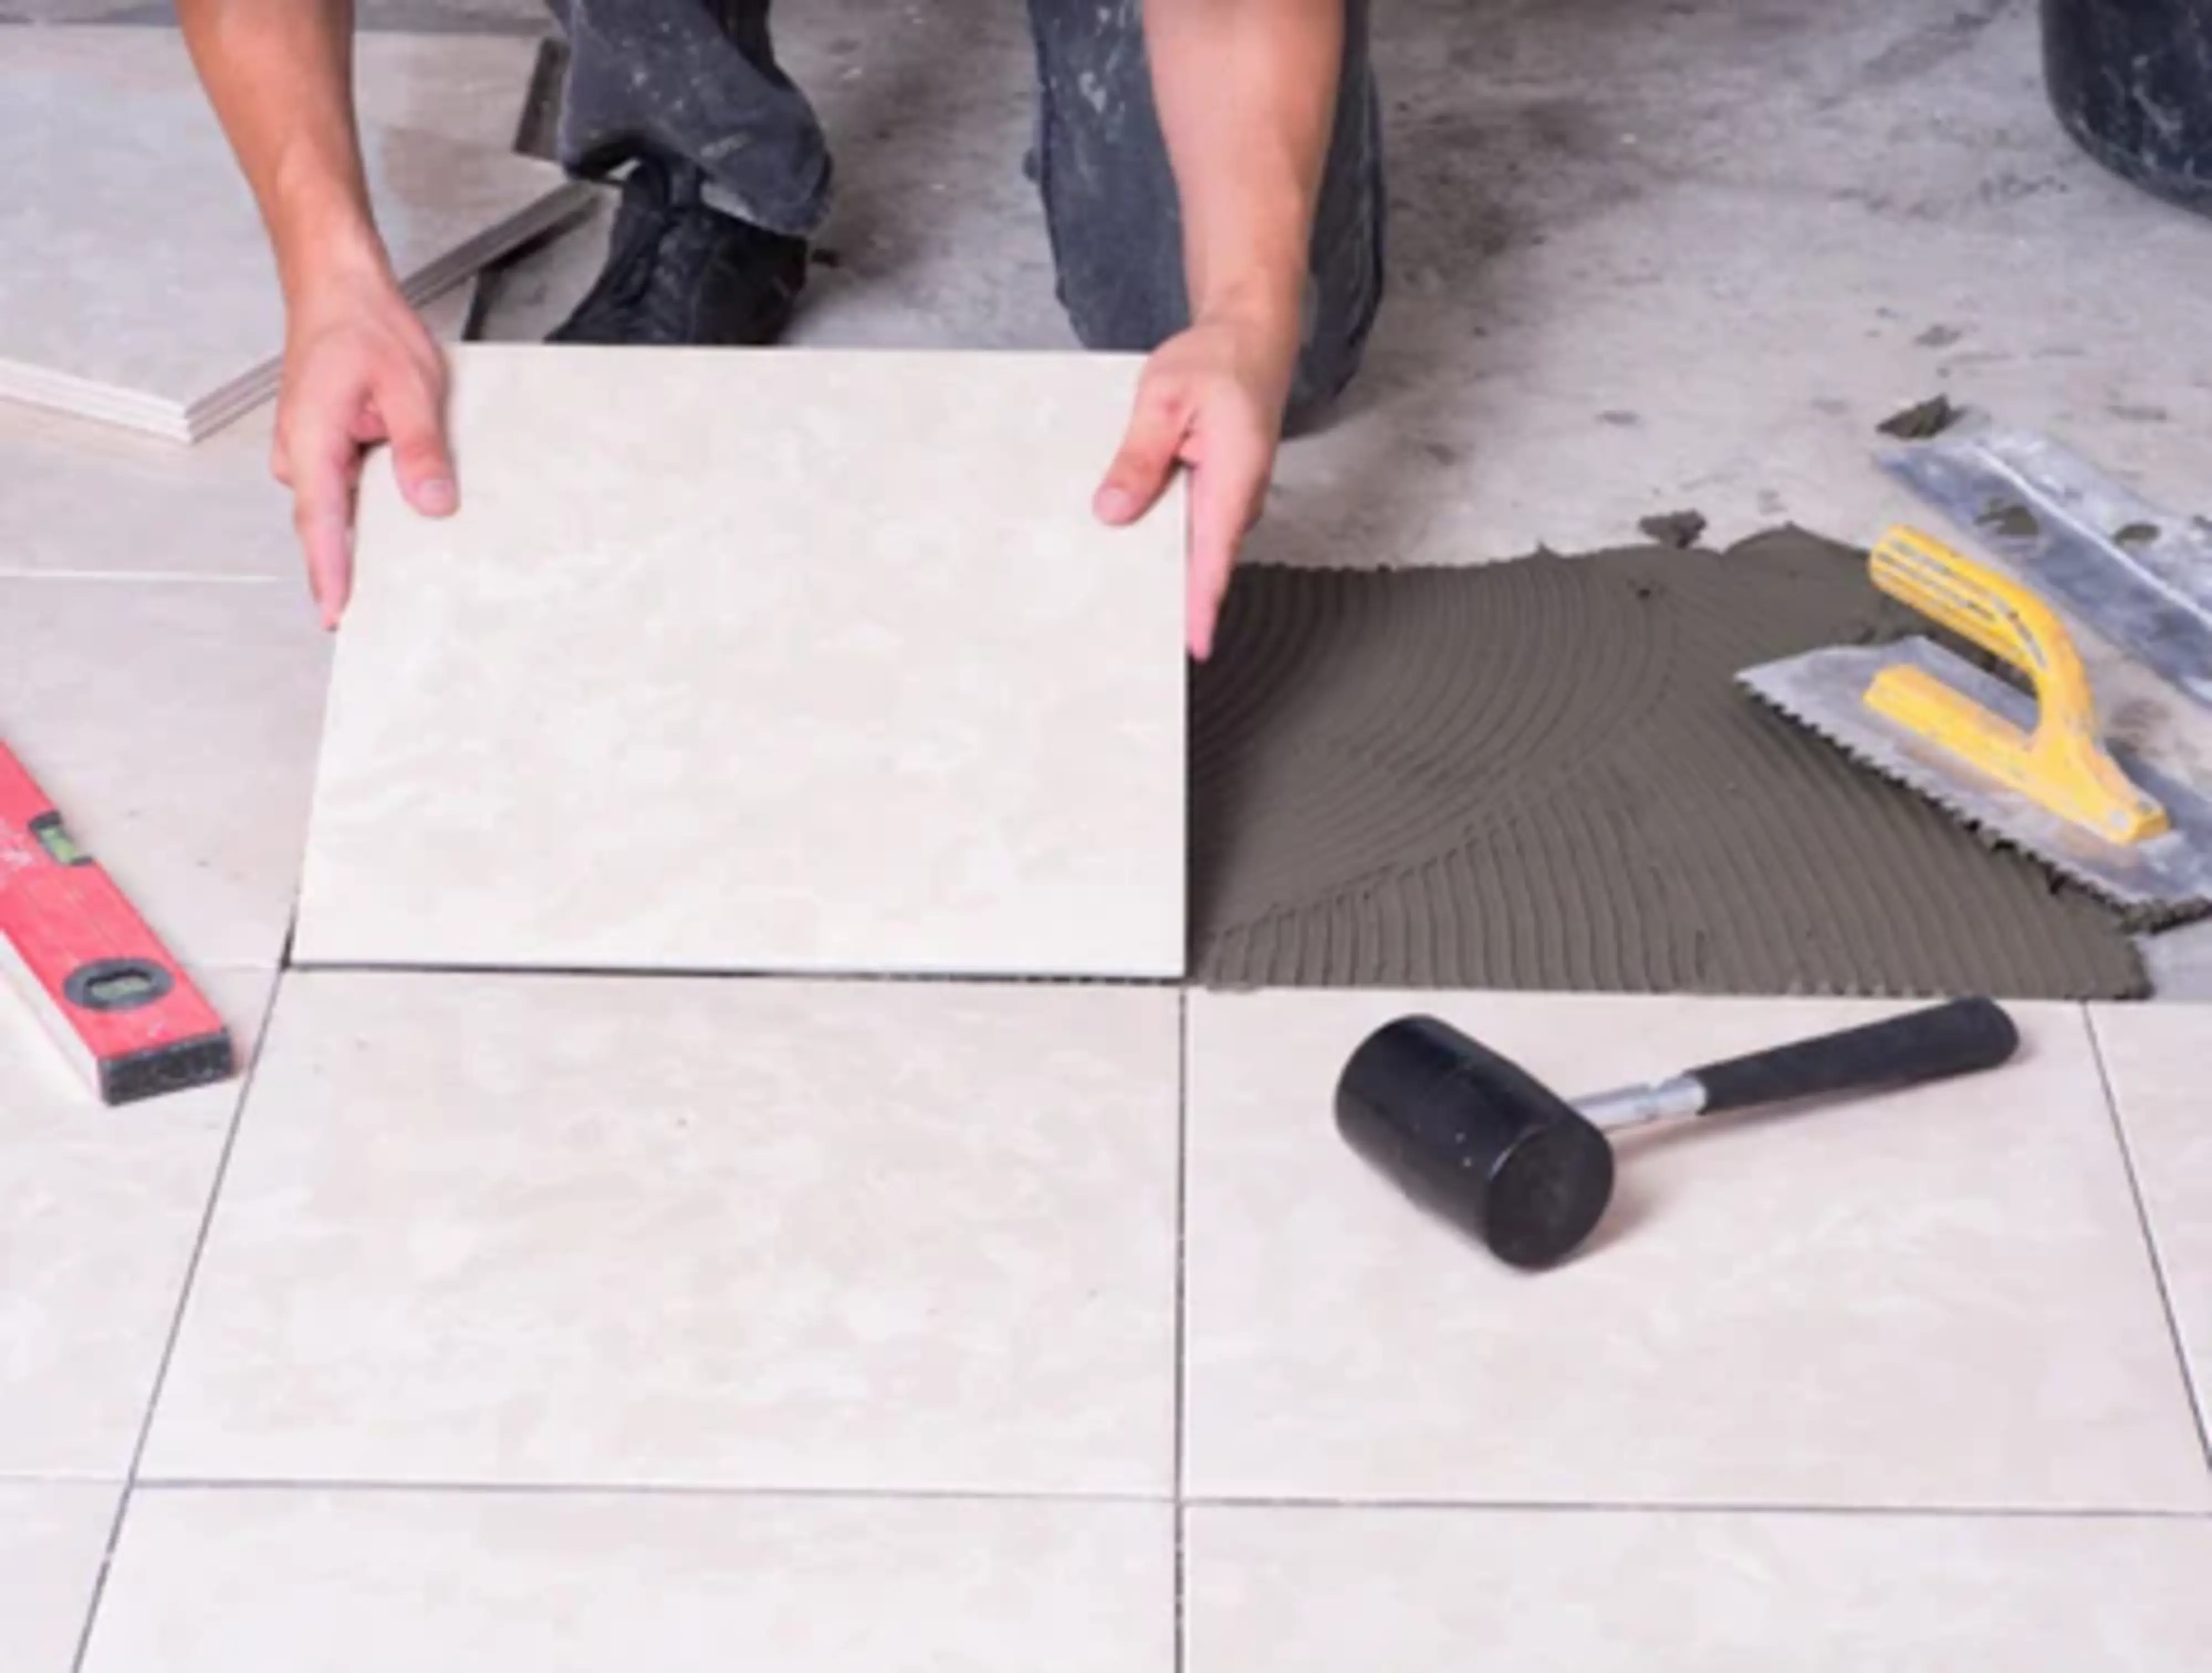
After spreading thinset with a notched trowel, place the tiles carefully, pressing them firmly into the mortar. This step ensures proper adhesion, reducing the likelihood of shifting or loosening over time. Regularly check the consistency to avoid premature drying or clumping, maintaining the tiles' integrity.
Applying thinset evenly helps avoid uneven tiles or weak spots, maintaining a level tile surface. Once the tiles are set, use a grout float to pull grout into the joints, sealing them securely. This comprehensive approach ensures a durable installation, preserving the tile floor's longevity.
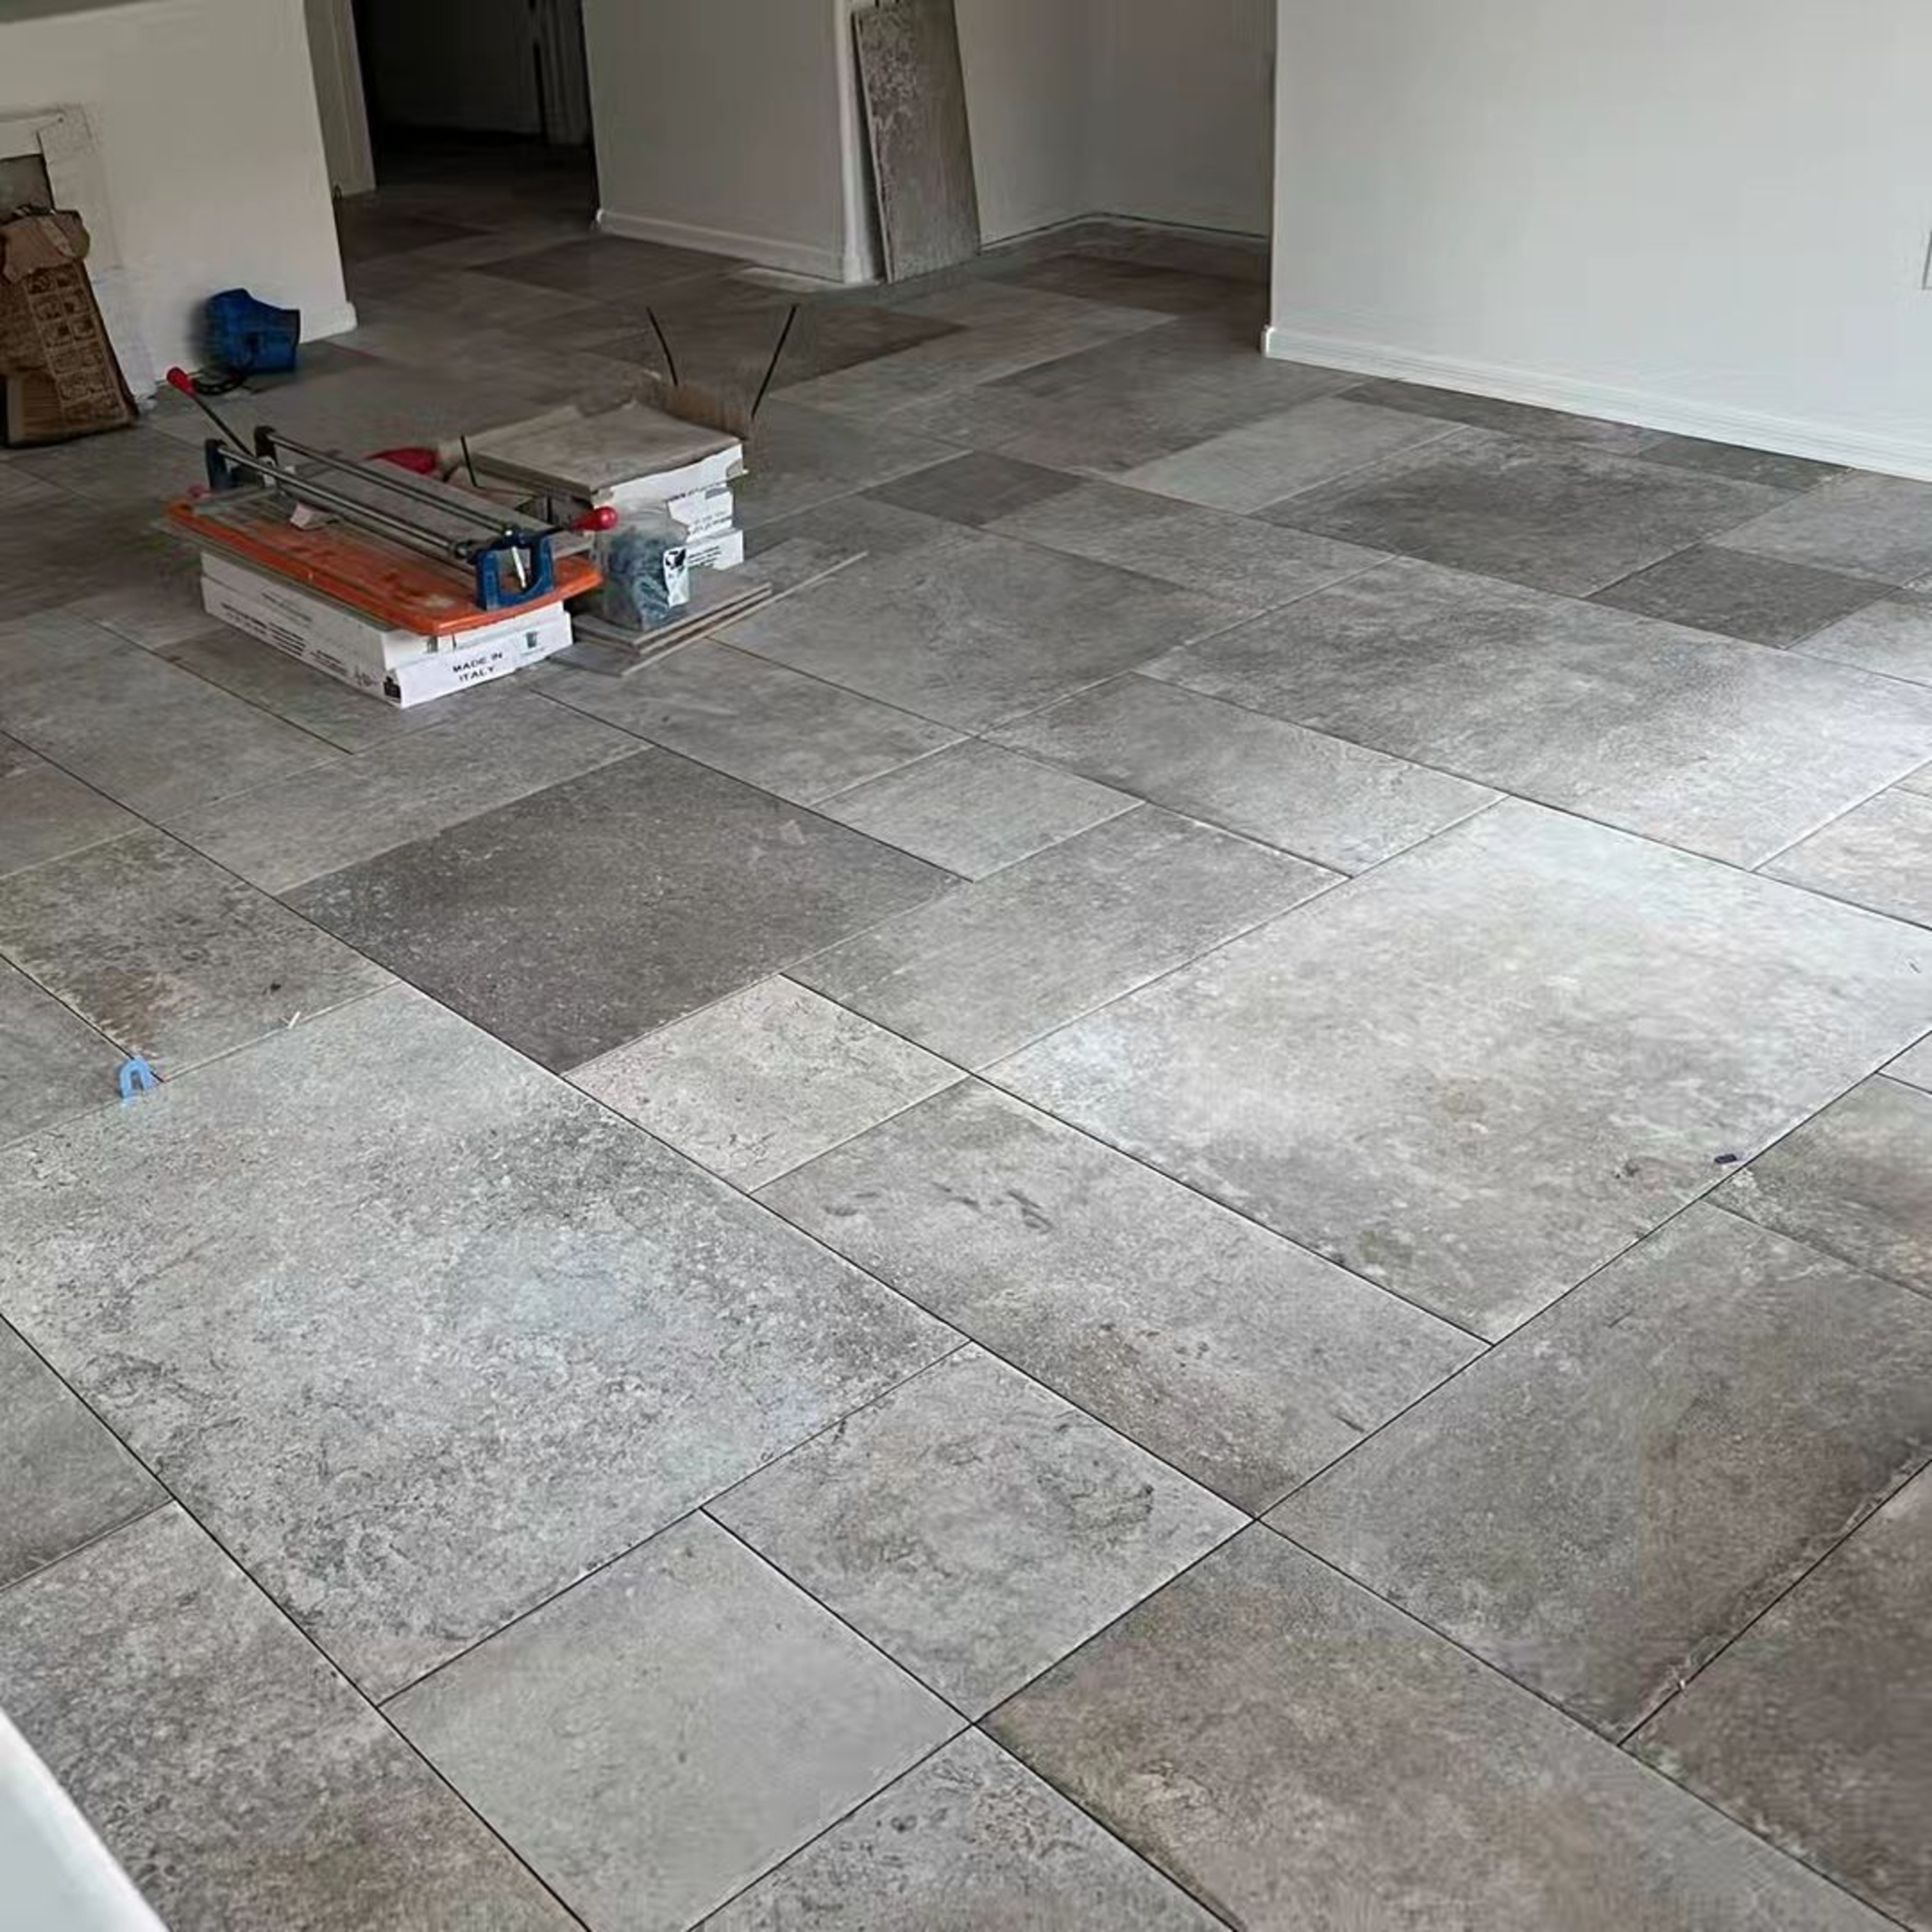
Tools Needed for Laying Tile
Laying tile requires various tools to ensure a professional finish. A notched trowel is essential for spreading thinset mortar evenly across the tile surface, ensuring secure adhesion. A diamond blade wet saw helps cut tiles to size, allowing for precise fitting around edges or obstacles, maintaining a seamless look.
A grout float is necessary for pulling grout into the joints, sealing them securely. This tool spreads grout evenly, ensuring a uniform finish and preventing gaps or cracks that could compromise the tile floor's integrity. Regular checks help maintain a balanced look, reducing the likelihood of uneven surfaces.
Additionally, a rubber mallet can be used to gently tap tiles into place, ensuring they sit flush against the floor. This balanced approach helps maintain an even surface, preserving the floor's integrity and extending its lifespan, reducing the need for repairs or adjustments over time.
Materials Needed for Laying Tile
Laying tile requires several materials to ensure a durable installation. Thinset mortar is essential for adhering tiles securely to the tile surface, preventing shifting or loosening over time. Grout is necessary to seal joints, pulling grout into the gaps between tiles to maintain a uniform look and consistent finish.
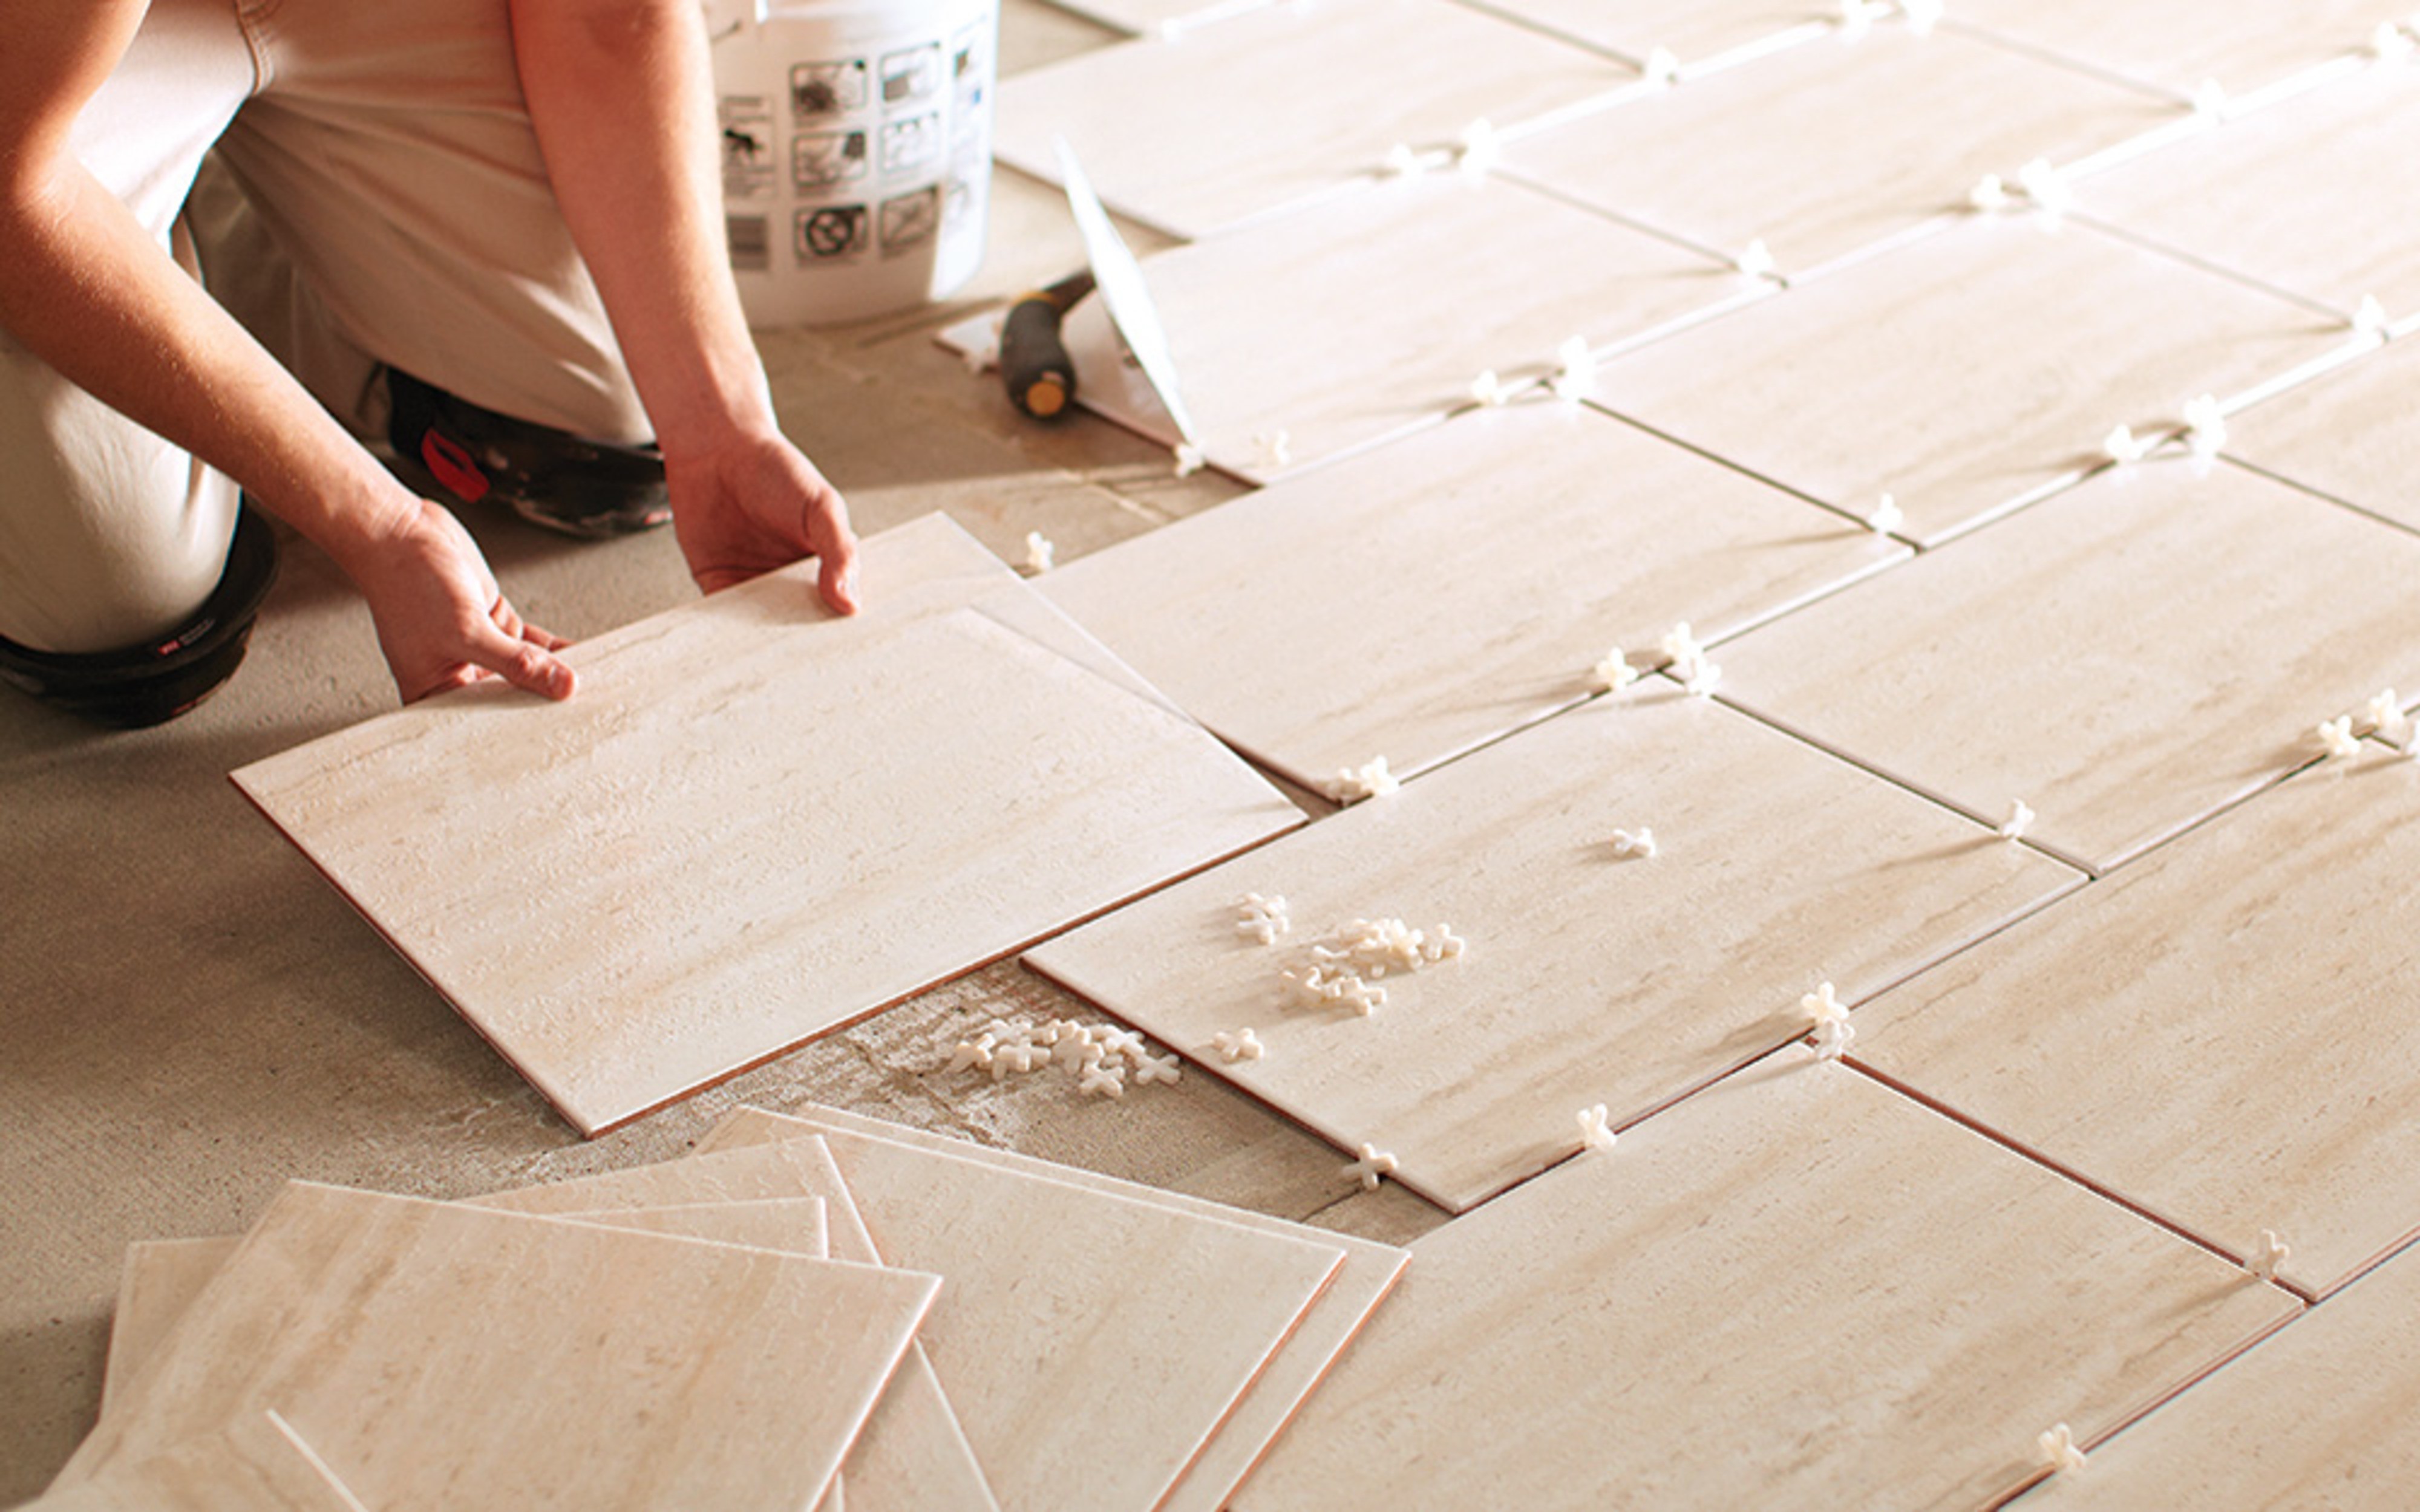
Tile spacers help maintain even gaps between tiles, ensuring uniform grout lines. These materials are removed after setting, allowing for smooth grouting, preserving the floor's appearance and reducing the likelihood of uneven joints that could compromise its integrity.
Additionally, a diamond blade is needed for cutting tiles to size, allowing for precise fitting around edges or obstacles. This balanced approach ensures a seamless finish, preserving the floor's integrity and extending its lifespan, reducing the need for adjustments or repairs over time.
Requirements For Floor Tile Installation
Floor tile installation requires careful planning and execution. Tiles must adhere securely to the surface, and after grouting, let the grout set fully to prevent shifting or cracking. Wall tiles, if installed alongside floor tiles, should also be grouted properly, maintaining a consistent look and ensuring all joints are sealed, preserving the floor's integrity.
Preparing to Install Floor Tile
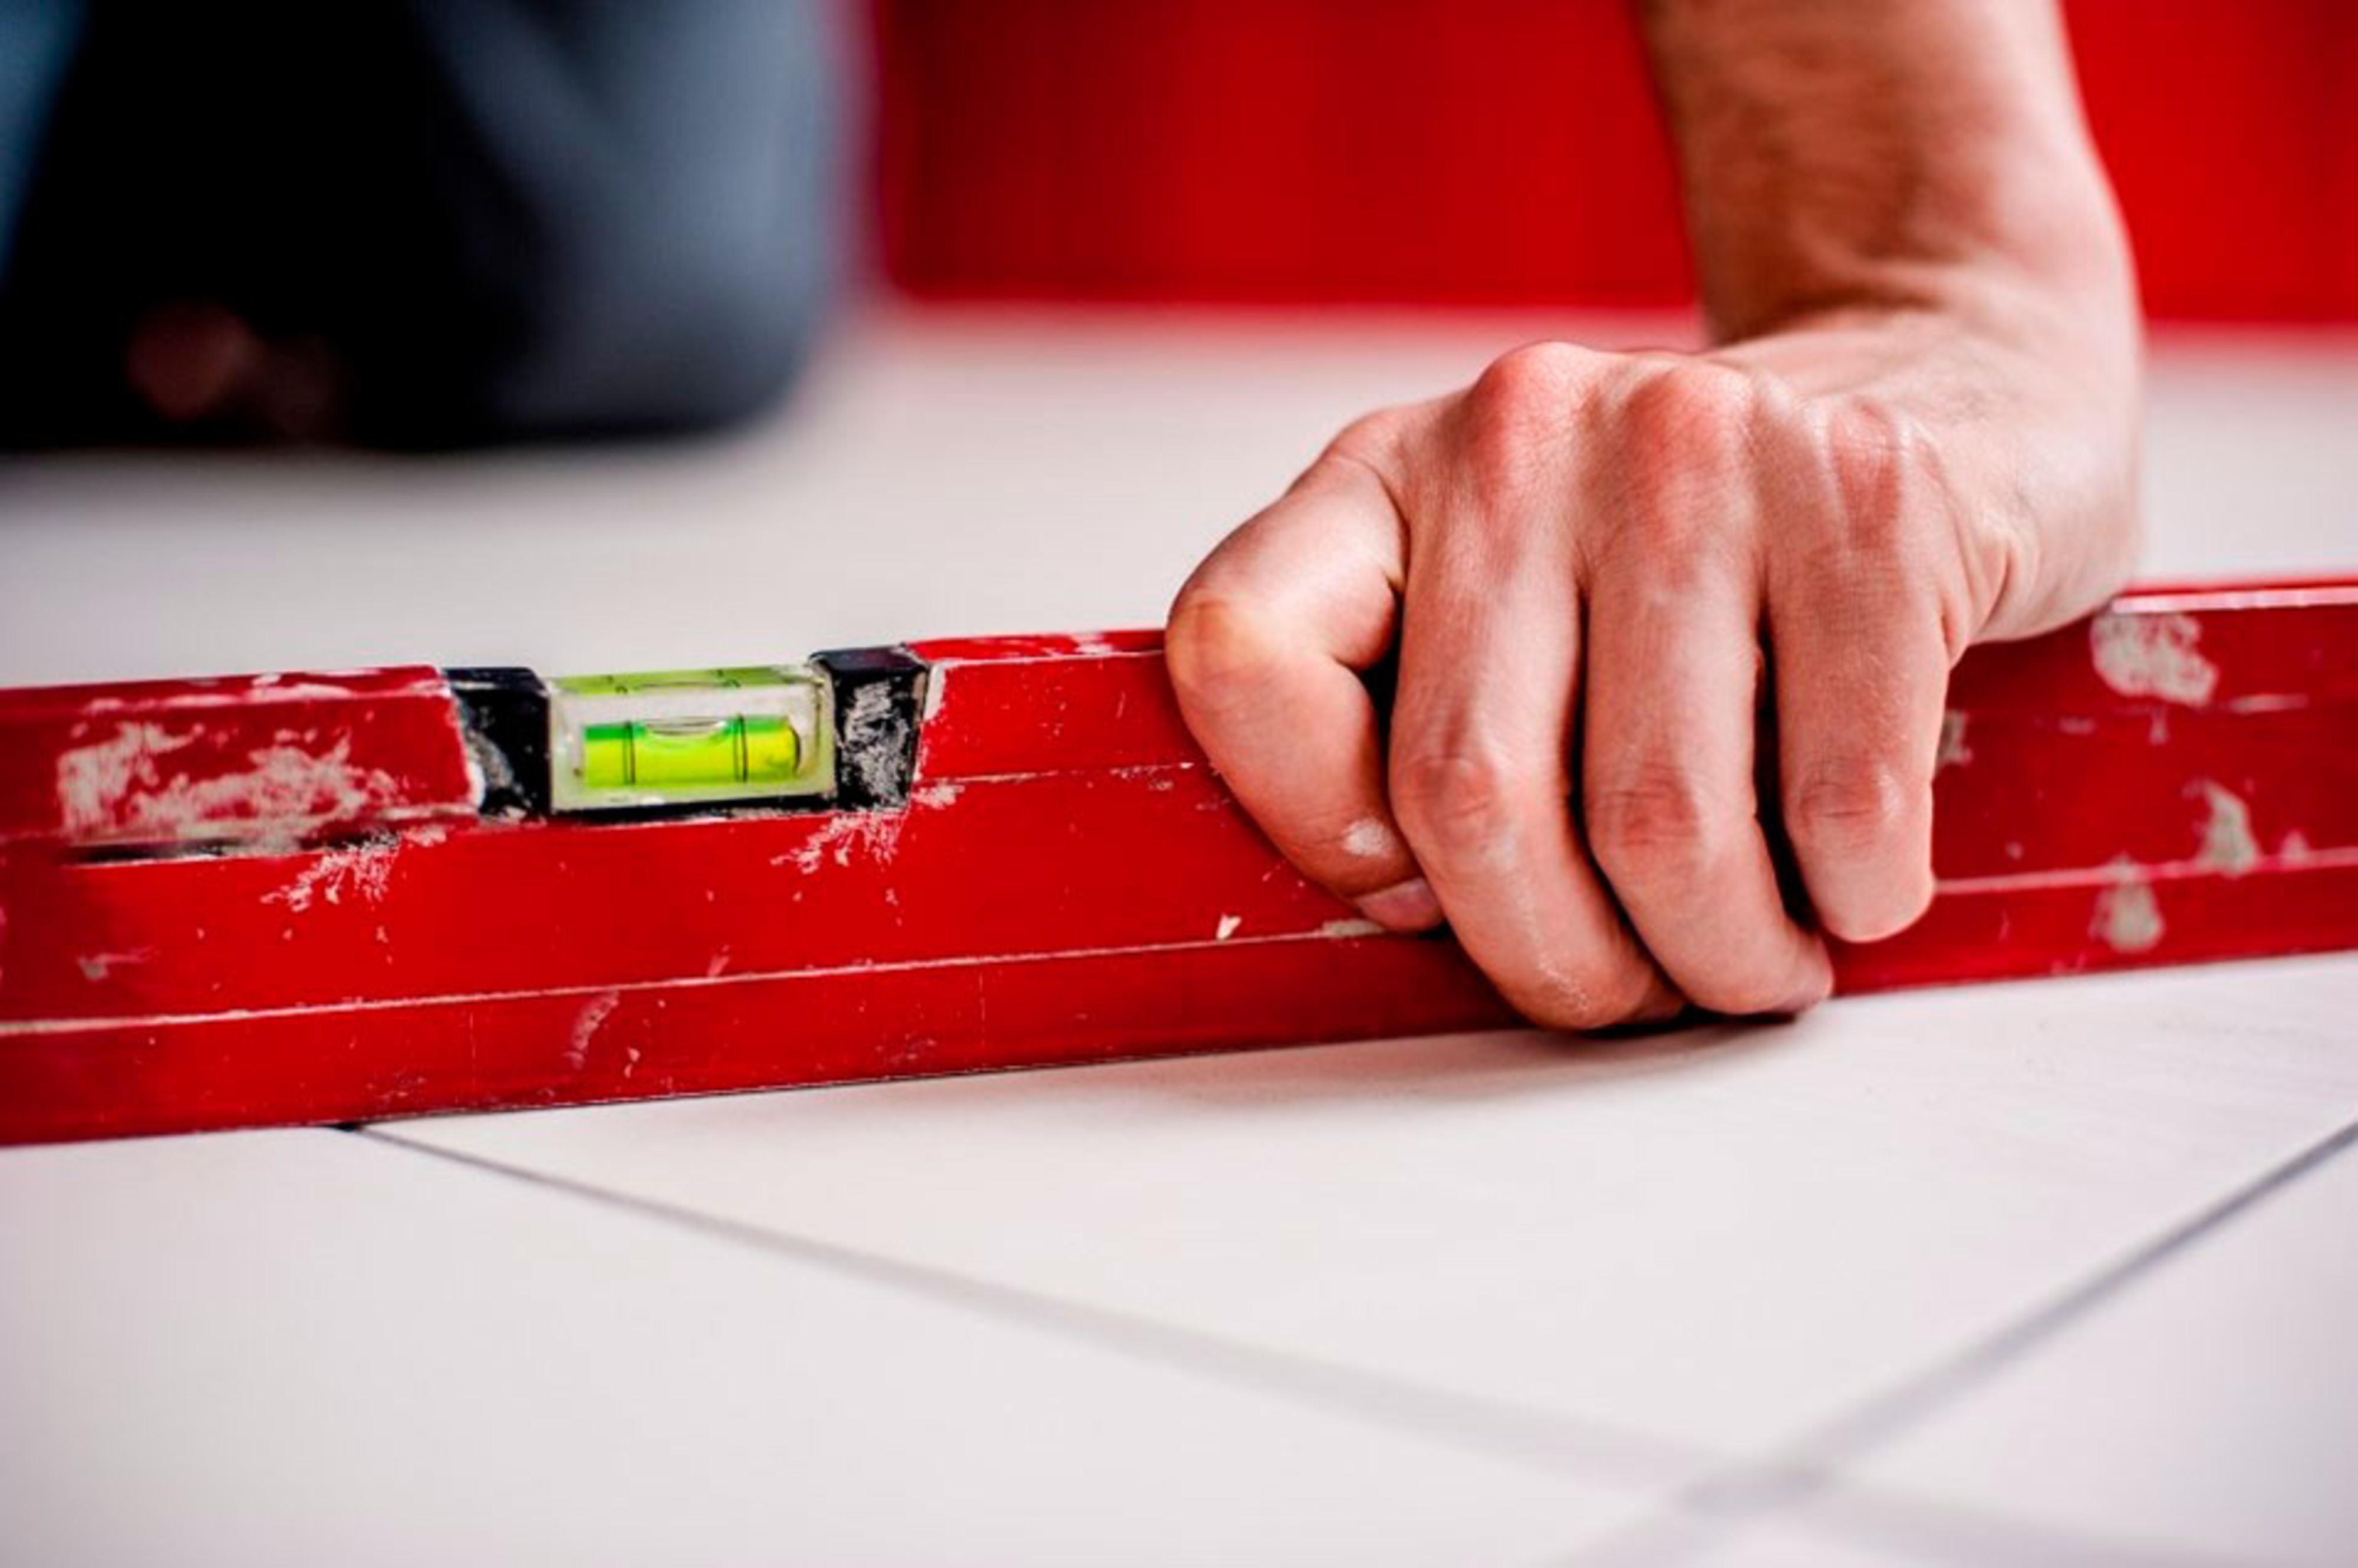
Preparing to install tile requires gathering all the tools and materials needed for a smooth installation. A notched trowel, thinset mortar, and tile spacers are essential for laying tiles securely. Before starting, ensure the subfloor is level and clean, correcting any uneven areas to maintain an even surface.
Plan the layout by measuring the space and marking chalk lines for tile placement, preventing uneven tiles or cuts. This step ensures a balanced installation, preserving the floor's integrity. Calculating square footage beforehand helps determine the number of tiles needed, avoiding over-purchasing or running short.
This thorough preparation helps maintain a seamless finish, reducing the likelihood of adjustments or repairs over time. This proactive approach ensures a balanced appearance and preserves the floor's durability, maintaining its integrity and extending its lifespan.
Installing Floor Tile
Installing floor tile involves spreading thinset mortar evenly across the surface, using a notched trowel. Position tiles carefully, pressing them firmly into the mortar, ensuring a strong bond. Tile spacers help maintain uniform gaps between tiles, allowing for consistent grout lines and preserving the floor's appearance.
After the tiles are set, grout tile joints to seal them securely, preventing water damage or shifting. This step maintains the floor's integrity, reducing the likelihood of cracking or shifting, preserving its appearance and ensuring a durable installation over time.
Proper installation, including careful positioning and secure grouting, ensures a balanced look and reduces maintenance needs. This balanced approach preserves the floor's integrity, minimizing the need for repairs or adjustments, ensuring a long-lasting installation.
Planning Your Layout
Planning the layout before installing tile ensures a balanced appearance and reduces waste. Start by measuring the space and marking chalk lines for tile placement, guiding the process. This step prevents uneven tiles or cuts, maintaining a seamless finish and reducing the need for adjustments or repairs.
Gather all the tools and materials needed for installation, including a notched trowel, spacers, and thinset mortar. This preparation helps maintain an even layout, ensuring tiles adhere securely, preserving the floor's integrity and reducing the likelihood of shifting or loosening over time.
After setting the tiles, grout tile joints to seal them securely, maintaining a consistent look. This balanced approach preserves the floor's appearance and ensures a durable installation, reducing the need for further repairs or adjustments, extending its lifespan.
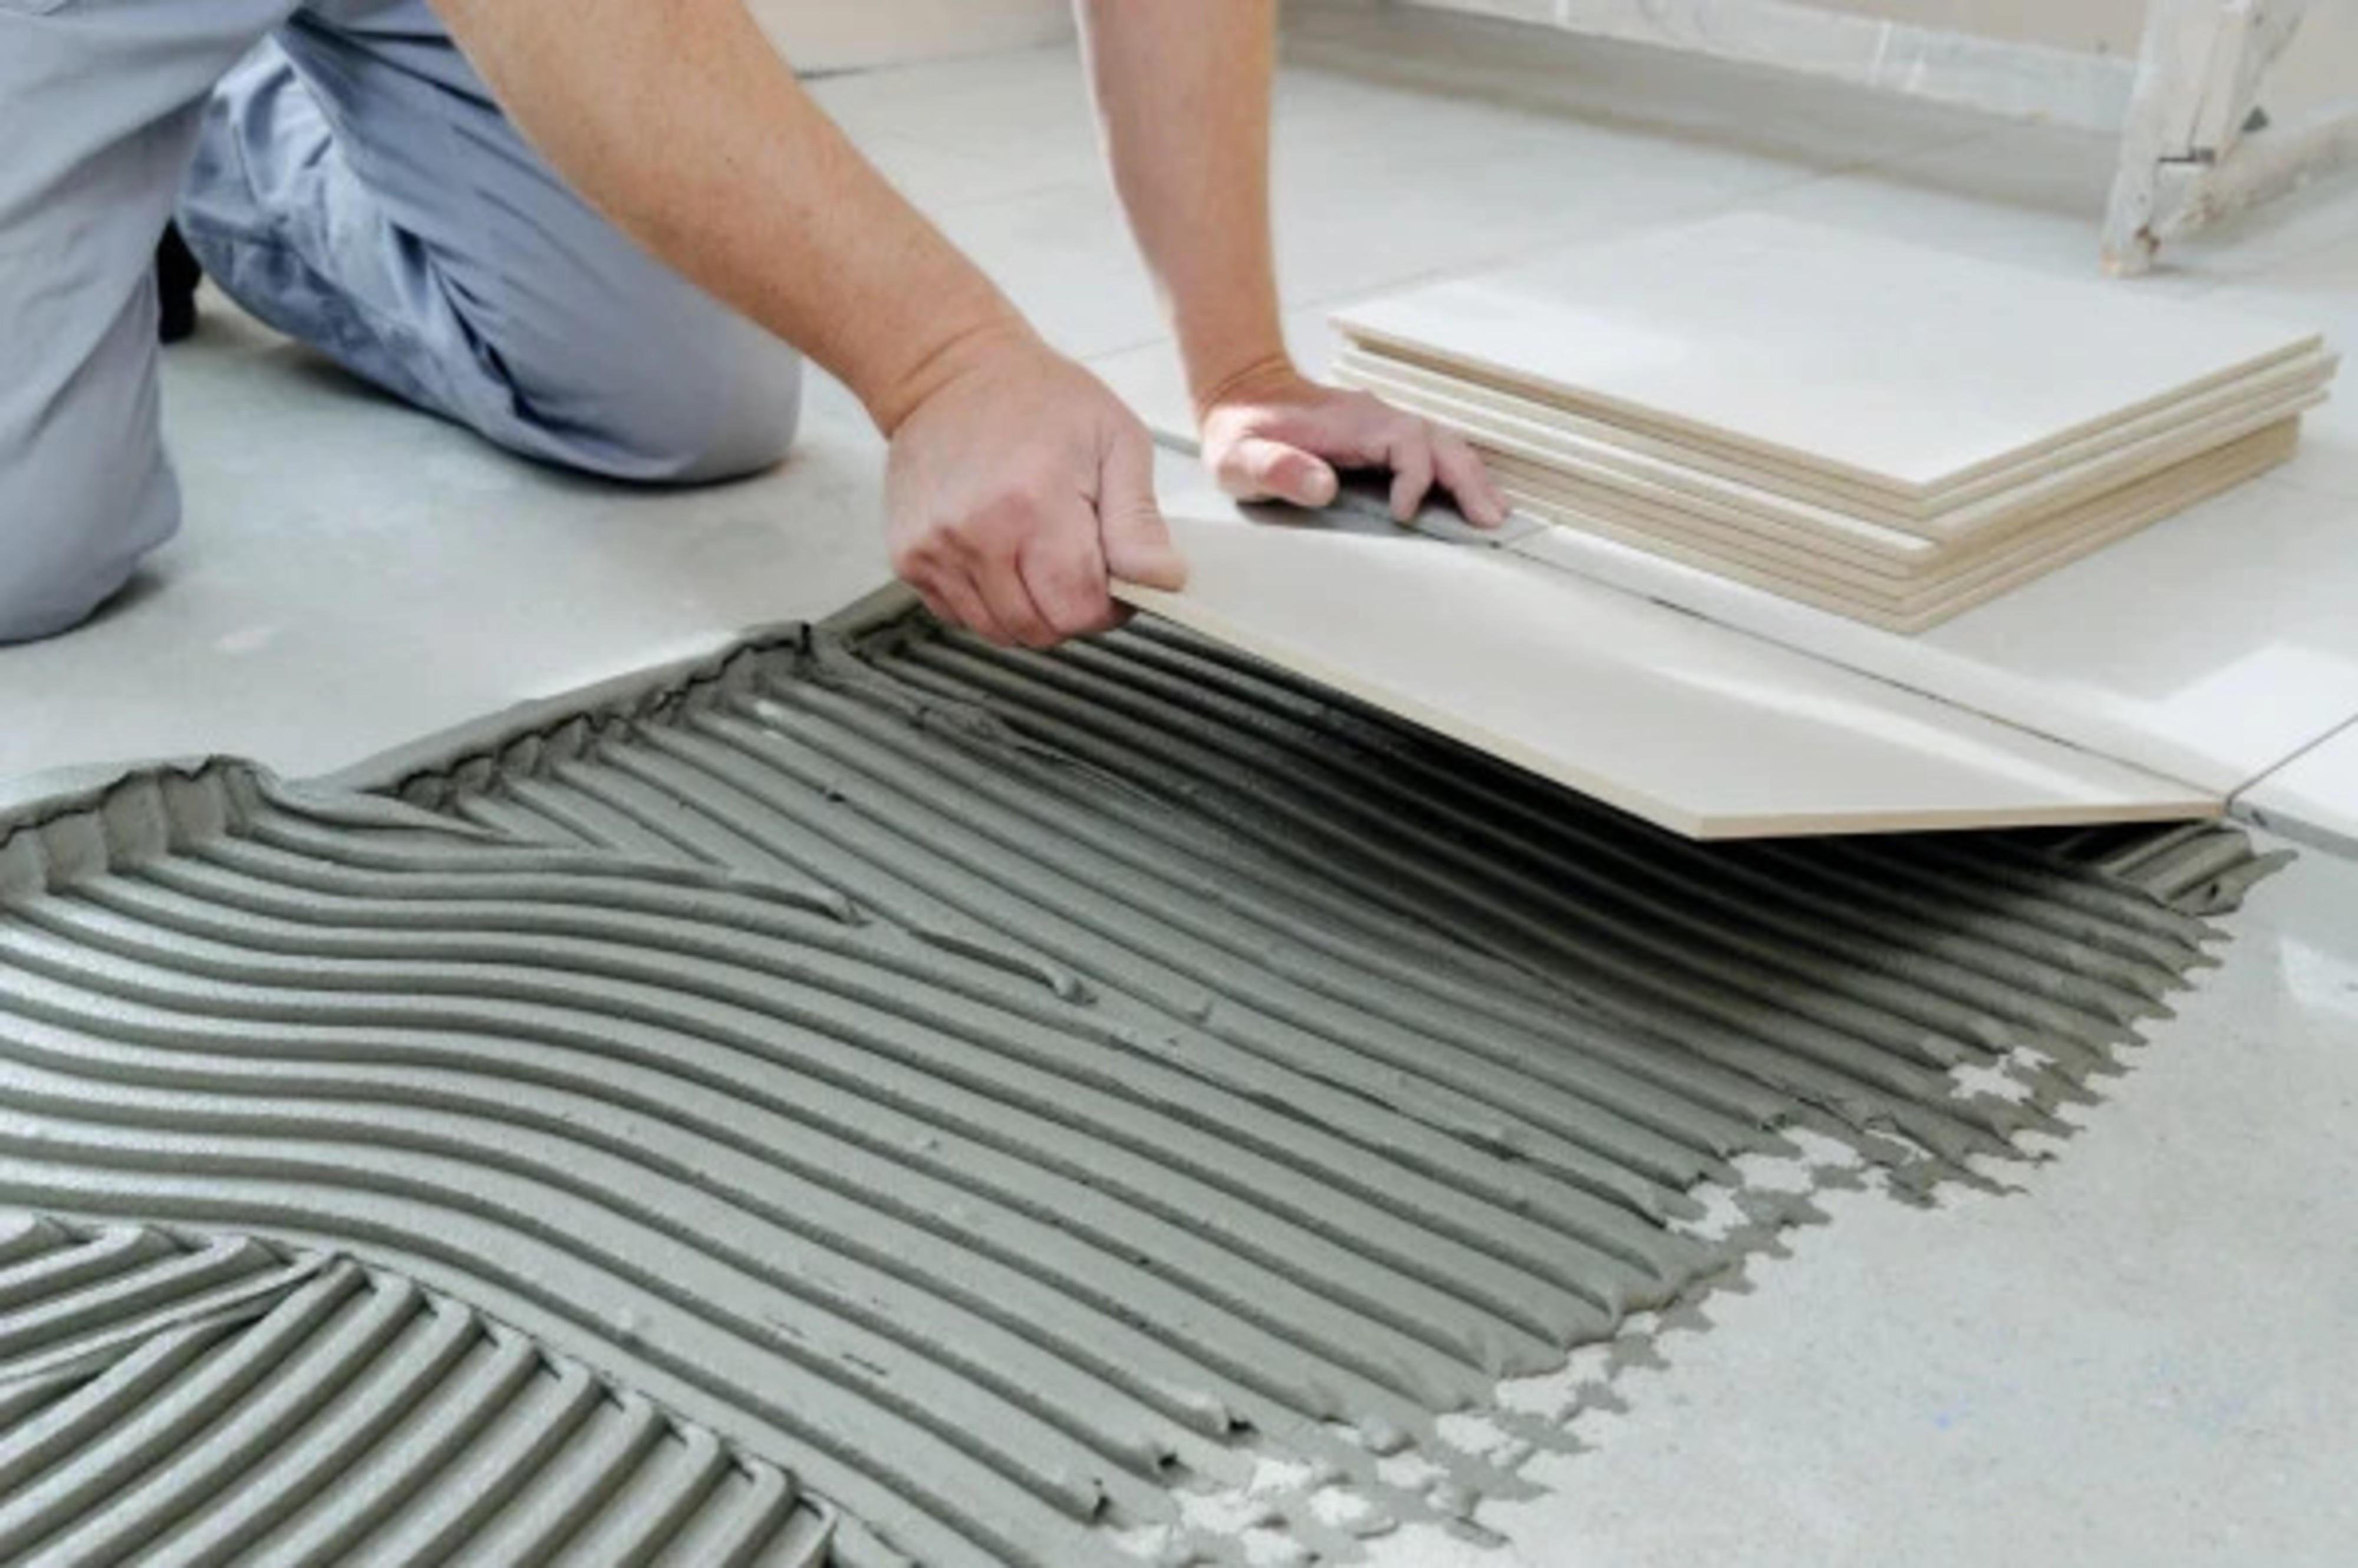
Spread thinset mortar
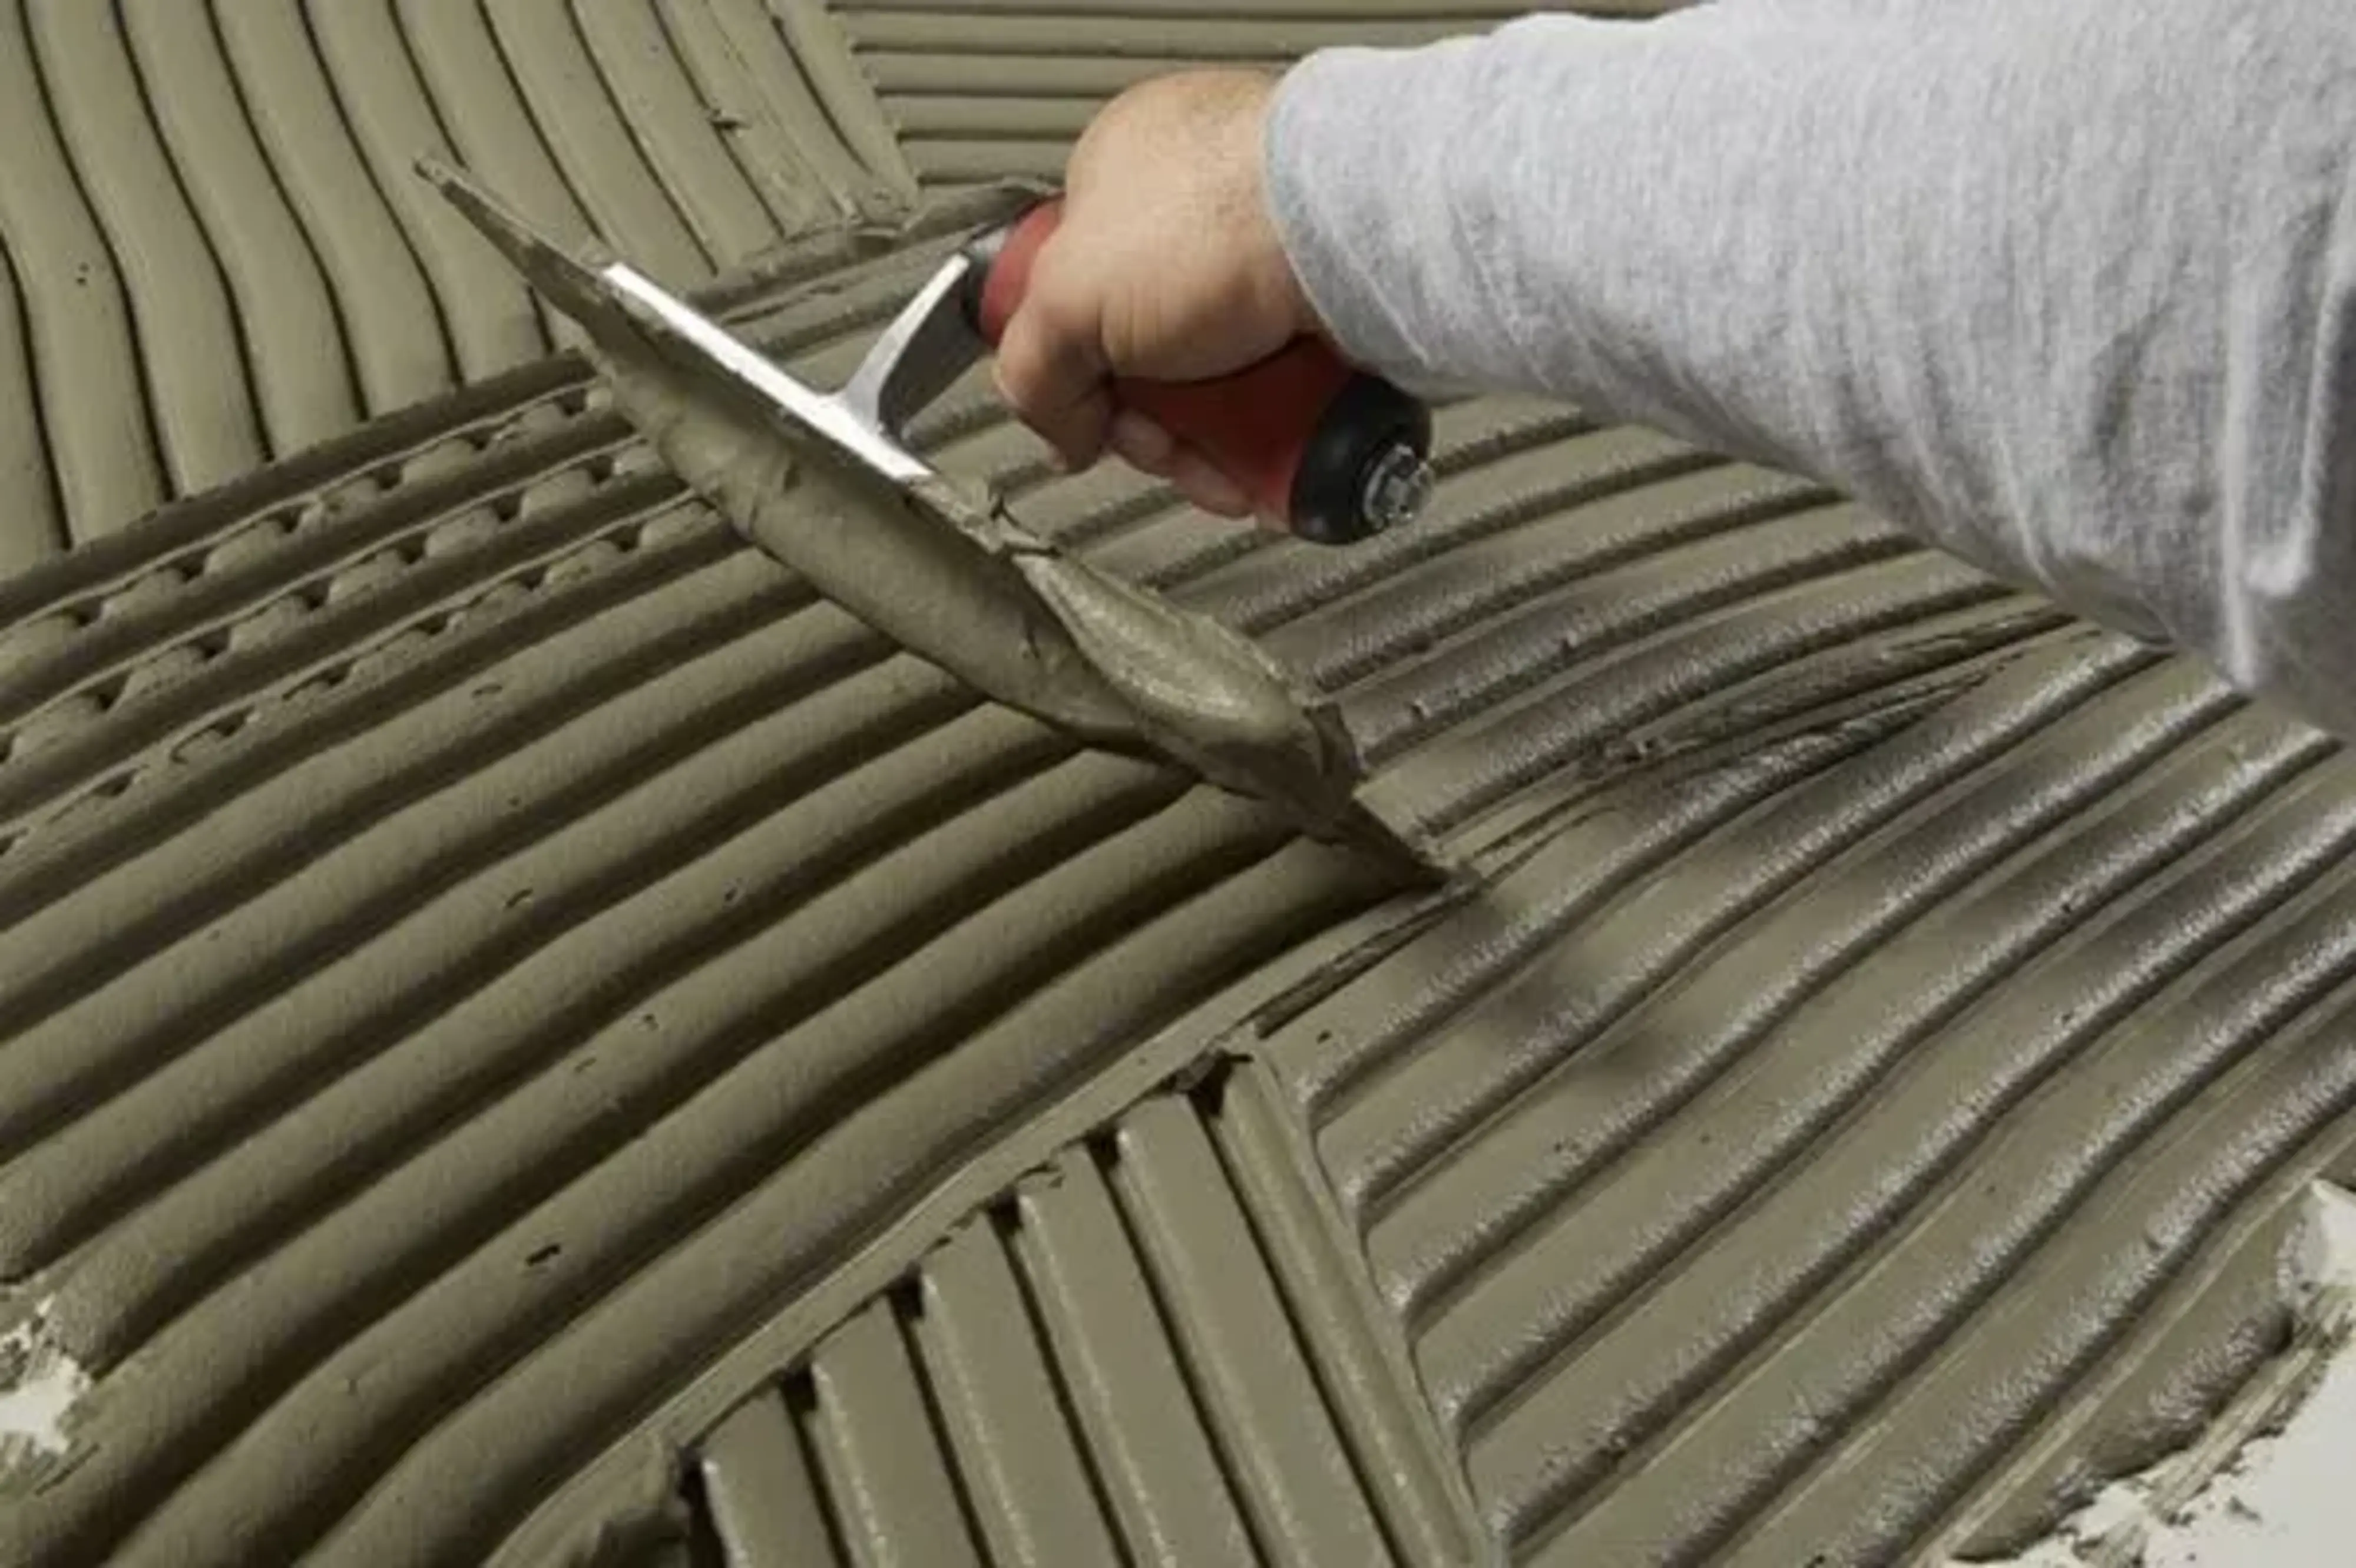
Spreading thinset mortar evenly across the surface is crucial for ensuring secure adhesion. Use a notched trowel to apply mortar from one wall to the opposite, maintaining even coverage. Carefully place the first tile, pressing it firmly into the mortar, ensuring a strong bond, and then continue laying tiles across the room.
For larger tiles, apply thinset mortar to the back of the tile as well, ensuring secure adhesion. This balanced approach prevents shifting or loosening over time, maintaining an even surface and preserving the floor's integrity, reducing the likelihood of repairs or adjustments.
Regular checks for even coverage help maintain a balanced installation, ensuring tiles adhere securely. This proactive approach prevents uneven surfaces, preserving the floor's appearance, maintaining its durability, and extending its lifespan, reducing the need for further maintenance.
Laying Thinset
Laying thinset involves applying it evenly across the floor, ensuring tiles adhere securely. Start at one wall, using a notched trowel to spread mortar, maintaining even coverage. Position the first tile carefully, pressing it into the mortar to create a strong bond, ensuring a balanced installation and preserving the floor's appearance.
For larger tiles or uneven surfaces, back buttering the back of the tile with thinset helps ensure secure adhesion. This balanced approach reduces the likelihood of shifting or loosening over time, maintaining the floor's integrity and extending its lifespan.
Consistent thinset application helps prevent uneven surfaces, preserving the floor's appearance. This proactive approach reduces the need for repairs or adjustments, maintaining an even installation and ensuring a durable finish over time.
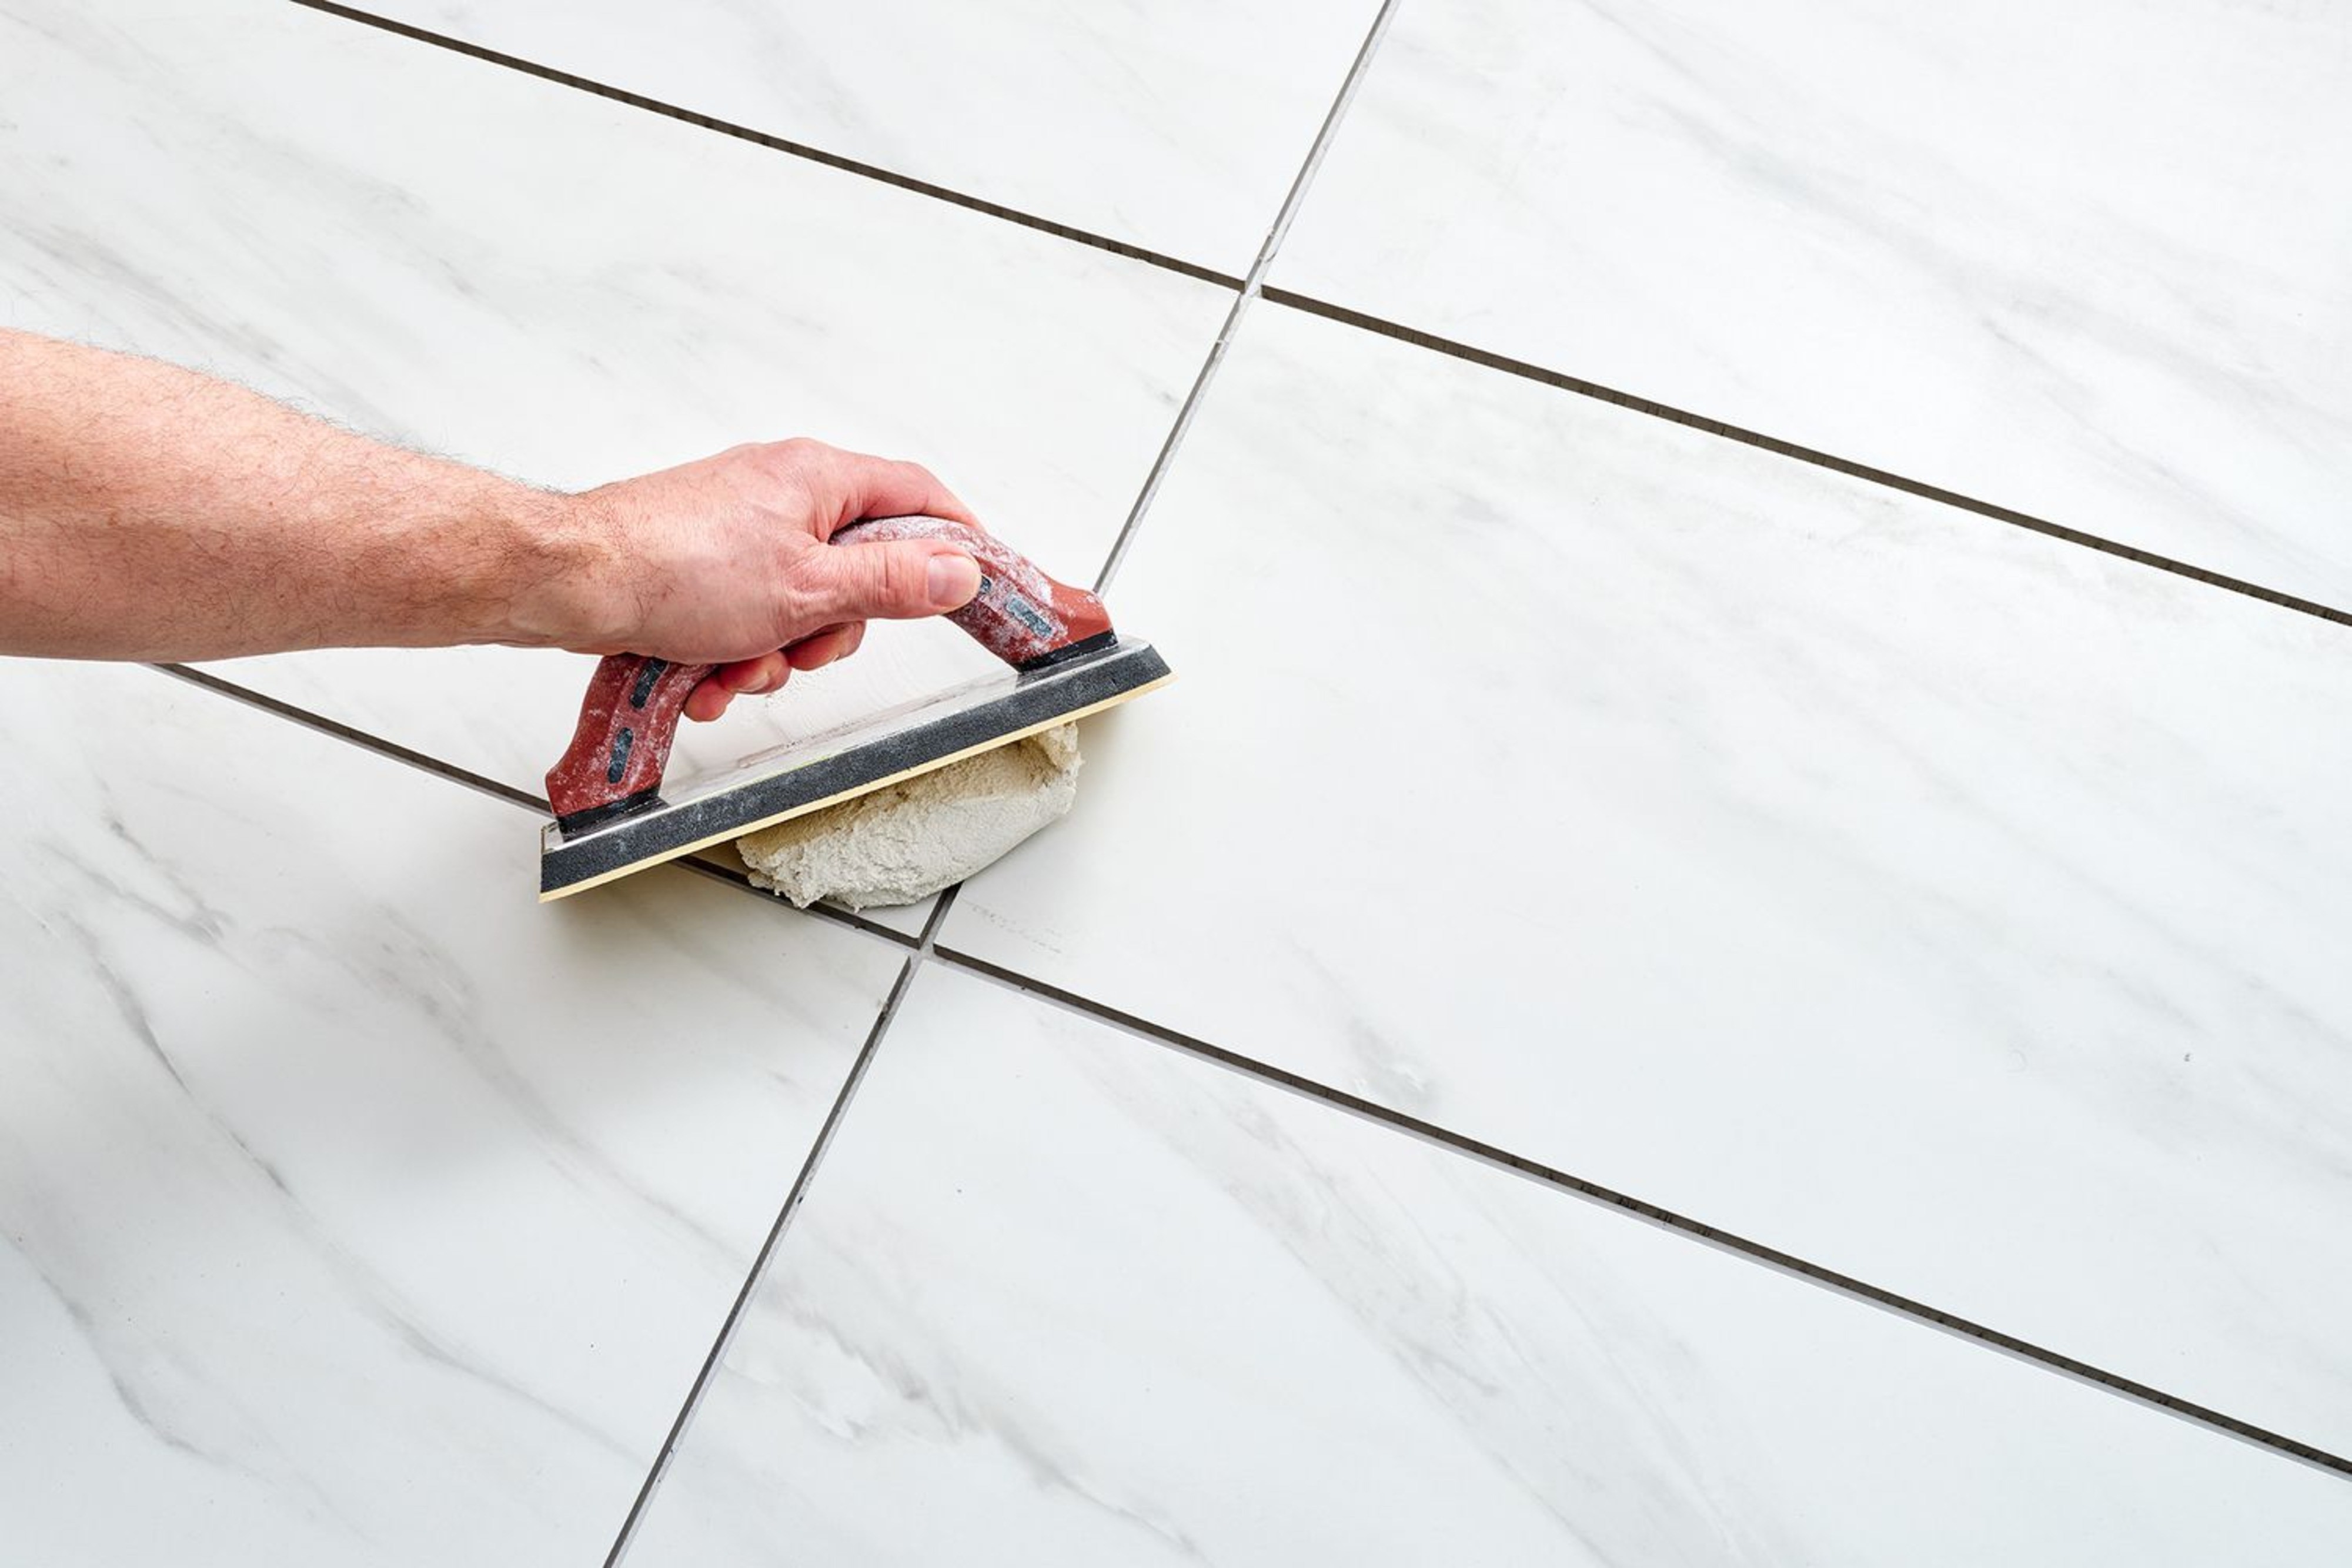
Cleaning up the grout
Cleaning up the grout after tiling is essential for preserving the floor's appearance. After grouting the joints, wipe the tiles with a damp sponge, removing excess grout from the tile surface. This process prevents a haze from forming, ensuring a clean finish, preserving the floor's look and integrity.
Ensure the grout sets fully before cleaning, avoiding damage or shifting. Consistent wiping helps remove grout from the back of the tile, maintaining an even appearance and reducing the likelihood of further maintenance, preserving the floor's integrity over time.
Regular cleaning helps prevent buildup, maintaining the floor's appearance. This balanced approach ensures a polished finish, preserving the floor's integrity and reducing the need for repairs, extending its lifespan and ensuring a balanced look over time.
Preparing for Grouting
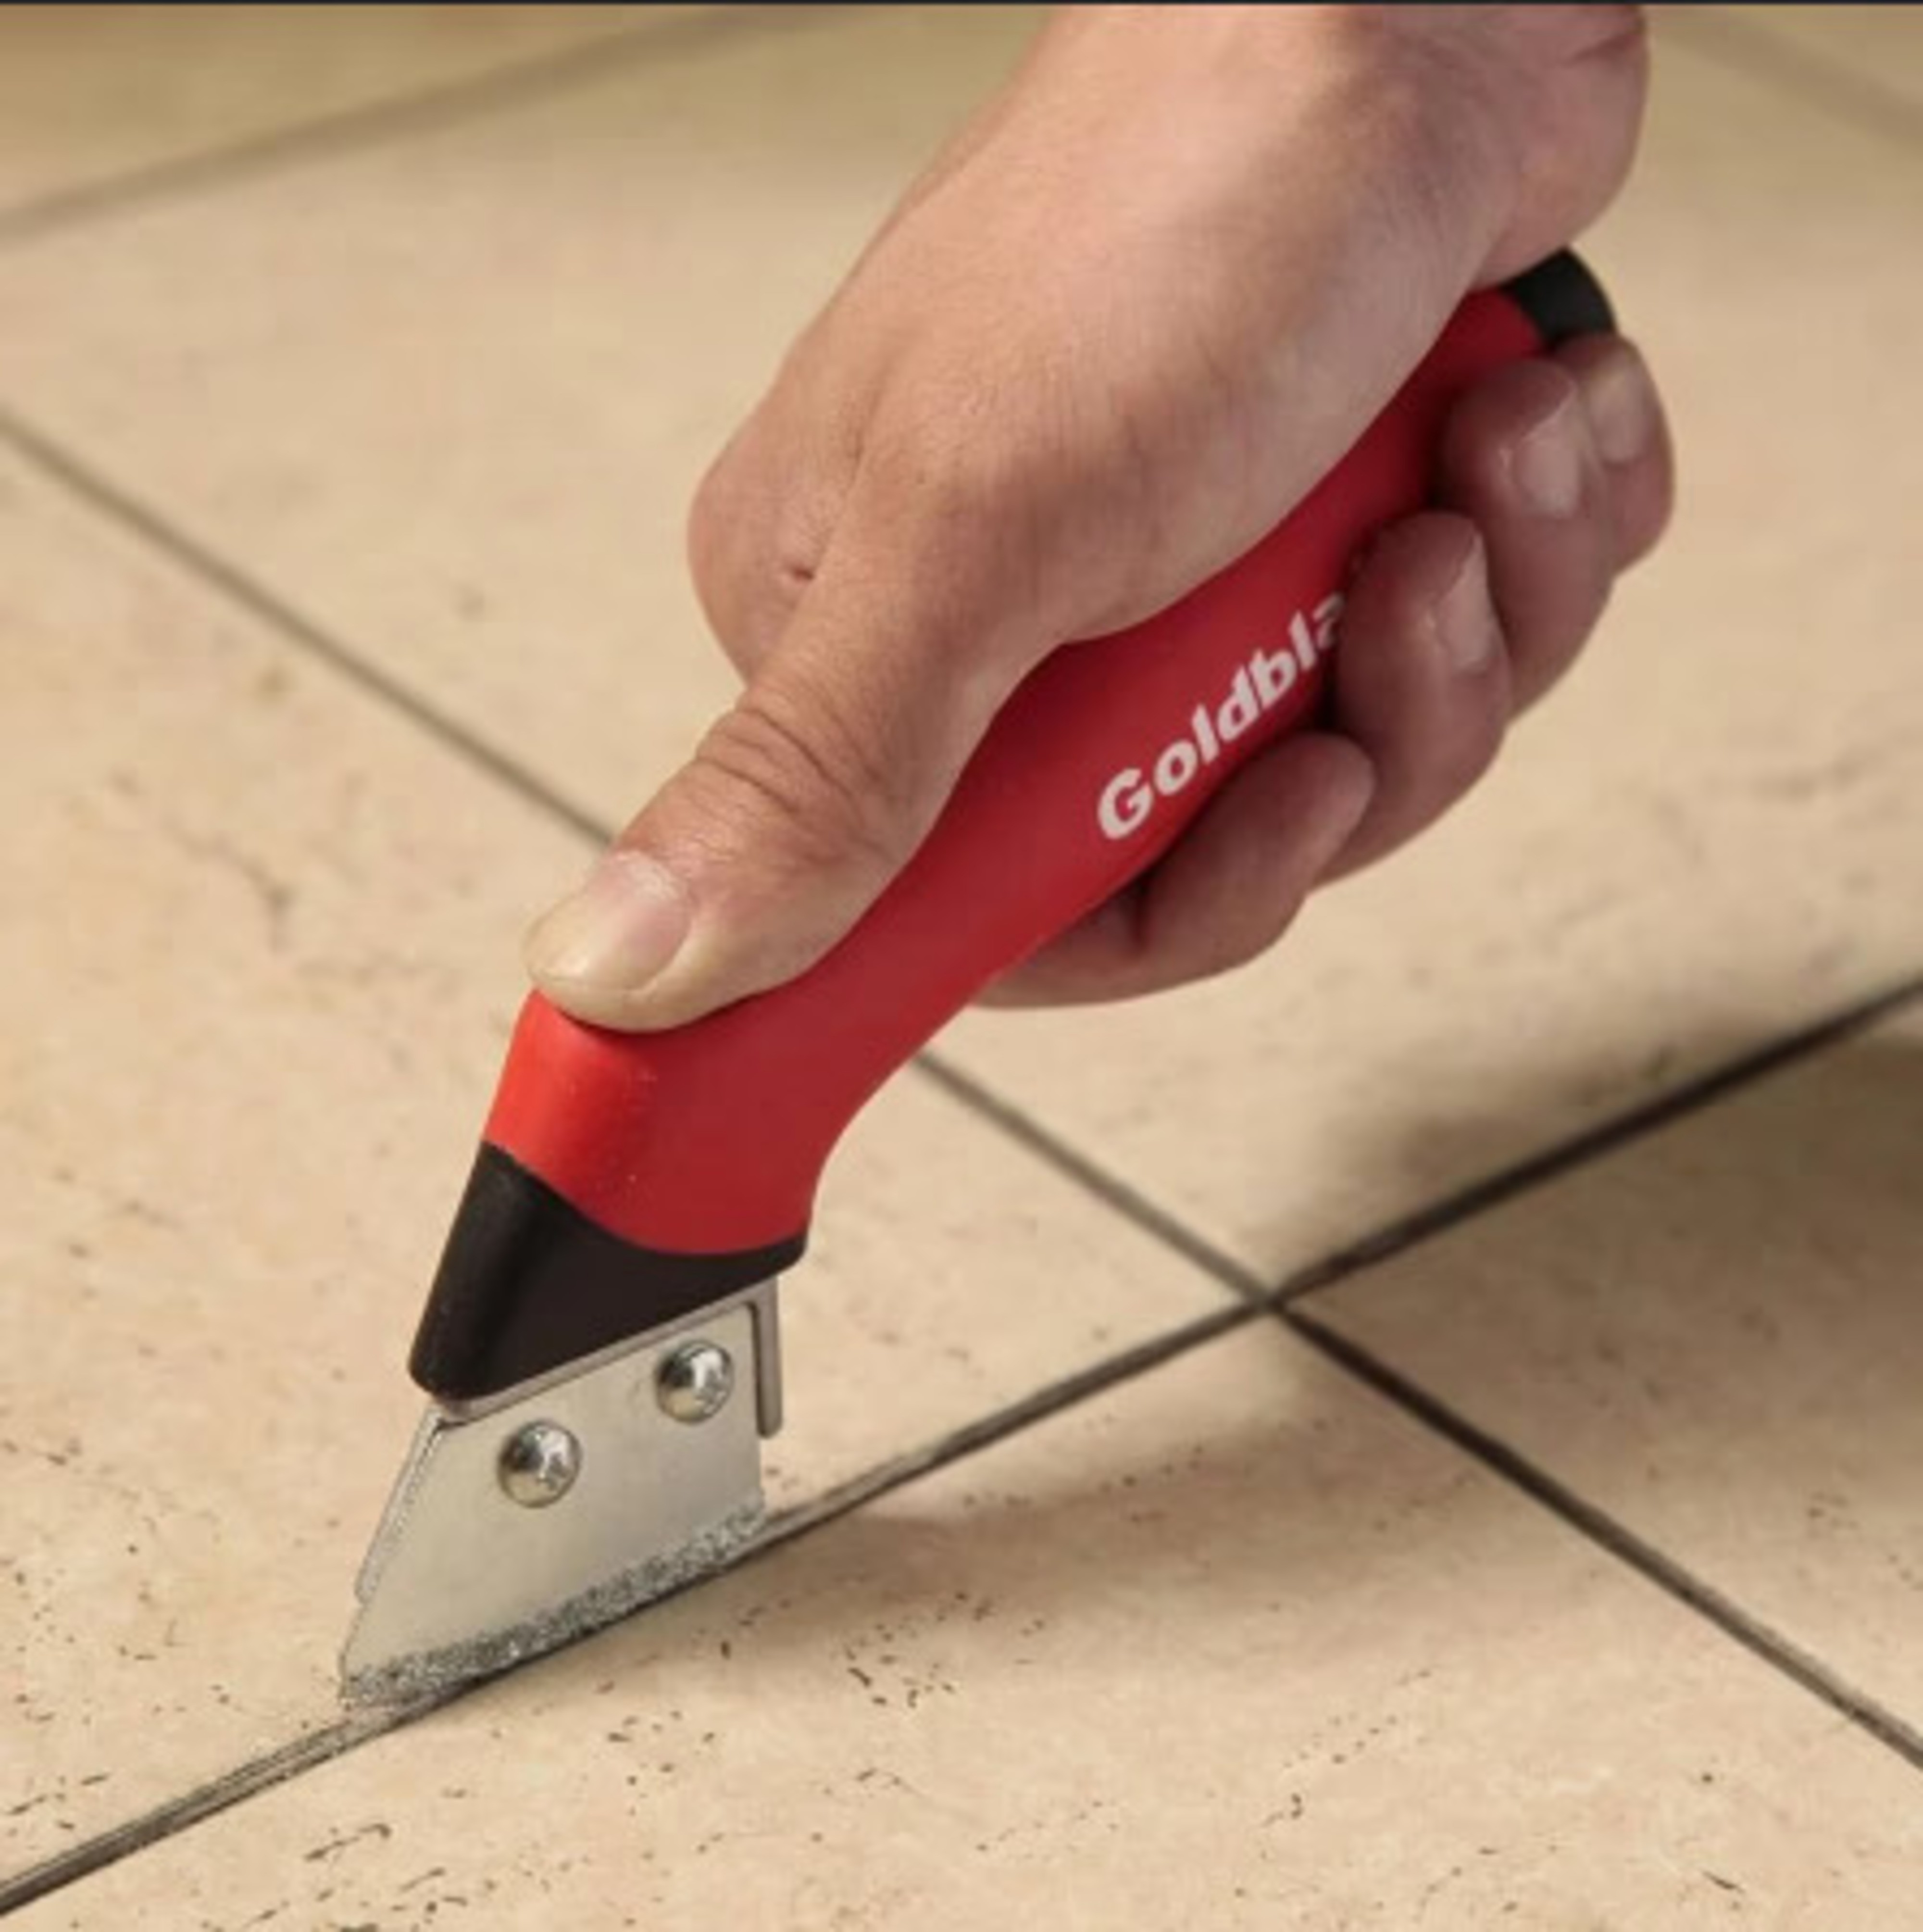
Preparing for grouting involves ensuring all the tile joints are clean and ready for grout application. Inspect the tile floor, removing debris or dust that could affect the grout's adherence. Marking a chalk line for grout joints helps guide application, maintaining even spacing and preventing uneven lines that could compromise the floor's appearance.
Ensure tiles are set securely, checking for movement or shifting. This proactive approach prevents further adjustments during grouting, maintaining a balanced look and preserving the floor's integrity, reducing the likelihood of repairs over time.
Regular checks help maintain an even installation, ensuring grout lines adhere securely. This balanced approach preserves the floor's appearance, maintaining its integrity and reducing the need for further maintenance, ensuring a polished finish over time.
Mixing Mortar & Laying the Main Floor
Mixing mortar to the right consistency is essential for a secure installation. Combine water and powdered thinset, following the manufacturer's instructions, mixing until smooth. Spread the mortar evenly across the floor using a notched trowel, maintaining even coverage to ensure ceramic tile adheres securely.
Position all the tile carefully, pressing each into the mortar to create a strong bond. Following chalk lines helps guide the layout, preventing uneven tiles or cuts, ensuring a balanced appearance and maintaining the floor's integrity over time.
Regular checks help ensure even mortar coverage, preserving the tile's position and reducing the likelihood of shifting or loosening. This proactive approach maintains a balanced installation, ensuring the floor's durability and minimizing the need for repairs or adjustments.
Applying the Grout
Applying grout fills joints between tiles, sealing them securely. Use a grout float to spread the mixture across all the tile joints, following chalk lines to maintain even spacing. This step prevents water damage or shifting, preserving the floor's appearance and maintaining its integrity over time.
After applying the grout, allow it to set fully before wiping away any excess. This prevents a haze from forming, maintaining a polished finish and ensuring an even look, reducing the likelihood of further maintenance or adjustments.
Regular cleaning after grouting helps remove any remaining residue, preserving the floor's appearance. This balanced approach maintains a consistent look, reducing the need for repairs or adjustments, ensuring a durable installation and extending its lifespan.